Making these waffles is simple, but the secret in buttermilk is the soft fluffiness and gentle tang that it gives the batter. It makes the waffles rise higher and taste richer without being heavy. The combination of crisp outside and tender inside makes each bite a delight.
I have made this recipe many times, and it never fails to impress my family. I use real buttermilk for the authentic taste, melted butter for richness, and a dash of vanilla extract for that warm bakery flavor. Always preheat your waffle iron well before pouring the batter because that is how you get crispy, golden waffles every time.
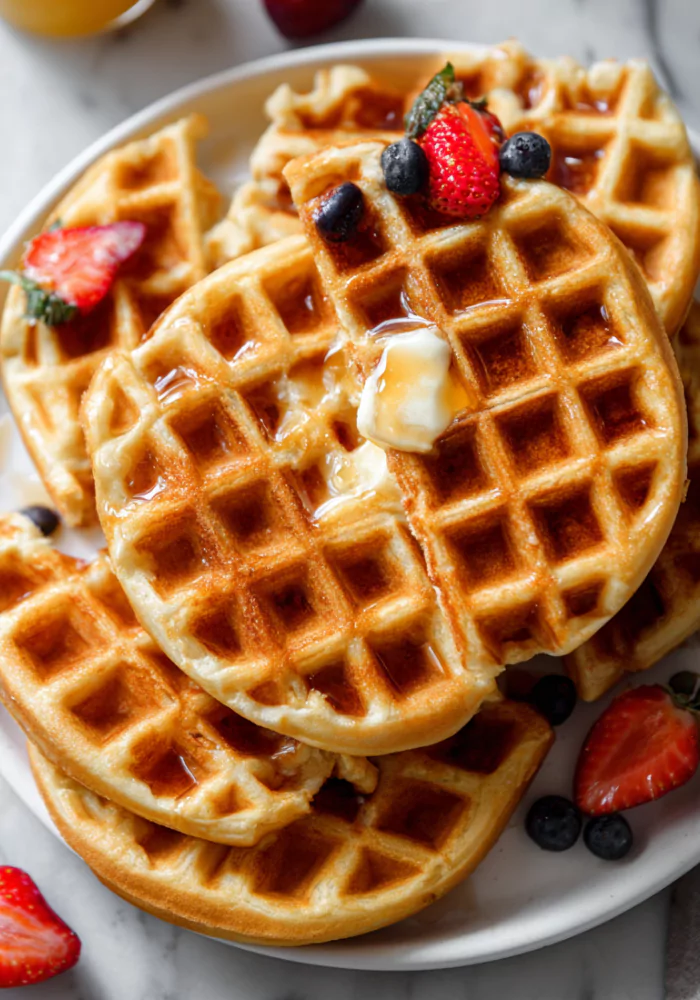
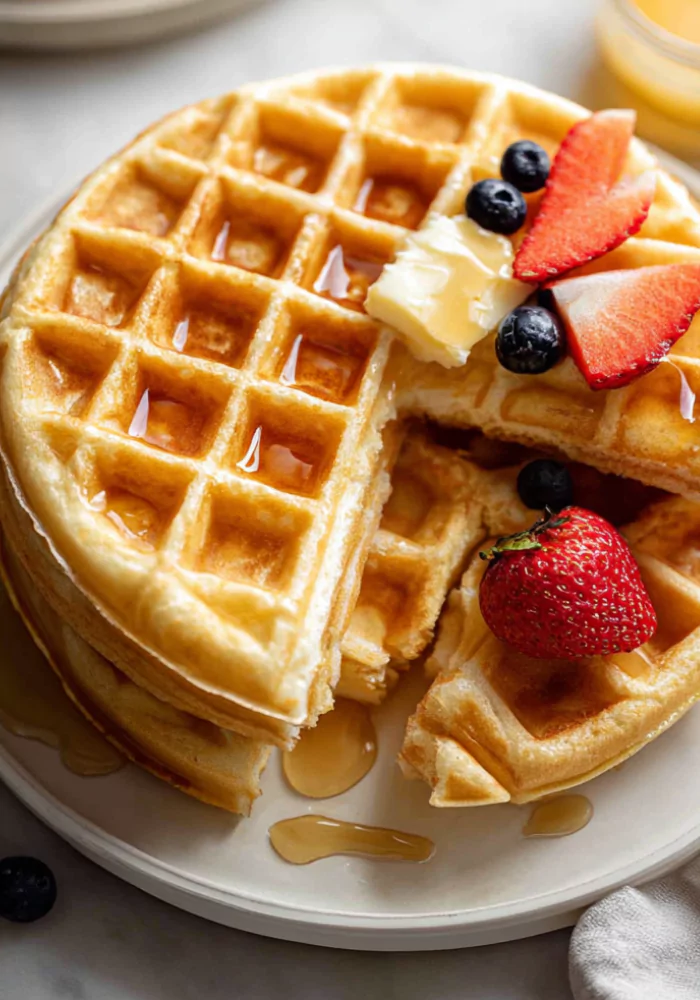
You can serve buttermilk waffles warm with maple syrup, some whipped cream, also with fresh berries or sliced bananas. For a richer treat, try adding chocolate sauce or caramel drizzle. You can even serve them savory-style with fried chicken, scrambled eggs, or crispy bacon for a hearty brunch plate.
Its Perfect For:
- Family breakfast on weekends
- Holiday brunches with guests
- Quick dinners when you crave comfort food
- Kids’ after-school snack with fruit
- Romantic breakfast in bed moments
Ingredients
- 2 cups all-purpose flour
- 2 tablespoons granulated sugar
- 2 teaspoons baking powder
- 1 teaspoon baking soda
- 1/2 teaspoon salt
- 2 large eggs
- 2 cups buttermilk (well-shaken)
- 1/2 cup unsalted butter, melted and slightly cooled
- 1 teaspoon vanilla extract
Kitchen Equipment You’ll Need
- Waffle iron (non-stick preferred)
- Mixing bowls (large and medium)
- Whisk or hand mixer
- Measuring cups and spoons
- Spatula
- Cooling rack (to keep waffles crisp)
How to make Buttermilk Waffles
Step 1
Preheat the waffle iron: Plug in your waffle iron and allow it to preheat fully while you prepare the batter. Lightly grease it with nonstick spray or melted butter to prevent sticking.
Step 2
Mix the dry ingredients: In a large mixing bowl, whisk together the flour, sugar, baking powder, baking soda, and salt until evenly combined. This ensures the leavening agents are well distributed for fluffy waffles.
Step 3
Prepare the wet mixture: In a separate medium bowl, beat the eggs lightly. Add the buttermilk, melted butter, and vanilla extract, whisking until the mixture is smooth and uniform.
Step 4
Combine wet and dry ingredients: Make a well in the center of the dry mixture and slowly pour in the wet mixture. Gently fold the batter together with a spatula until just combined. Do not overmix—small lumps are perfectly fine and help the waffles stay tender. Let the batter rest for 5 minutes while your waffle iron continues to heat.
Step 5
Cook the waffles: Pour batter into the center of the hot waffle iron (amount will vary depending on your waffle maker). Close the lid and cook according to manufacturer’s instructions, usually 3–5 minutes, until golden brown and crisp. Carefully remove the waffle and place it on a wire rack to prevent sogginess while cooking the rest.
Step 6
Serve warm: Stack the waffles on a platter and serve immediately with your favorite toppings such as butter, maple syrup, fresh fruit, or whipped cream. For an extra treat, drizzle with chocolate sauce or sprinkle with powdered sugar.
Tips for Making Buttermilk Waffles
- Preheat the waffle iron fully – A hot iron ensures waffles cook evenly, crisp up quickly, and don’t stick. Cold irons make soggy waffles.
- Don’t overmix the batter – Stir until the wet and dry ingredients just come together. Lumps are fine and keep the waffles light.
- Rest the batter before cooking – Let it sit for 5 minutes. This helps the gluten relax and gives fluffier waffles.
- Grease the iron lightly – Even if it’s non-stick, brushing with melted butter or oil makes release easier and flavor better.
- Use real buttermilk if possible – Substitutes work, but real buttermilk adds extra tang and tenderness.
- Keep waffles warm in the oven – Place cooked waffles on a baking sheet in a 200°F oven until serving. This avoids sogginess.
- Avoid stacking hot waffles – Steam will soften them. Keep them in a single layer until served.
Optional Ingredients
- 1 teaspoon cinnamon for warmth
- 1/4 cup mini chocolate chips for sweetness
- 2 tablespoons shredded coconut for texture
- 1 teaspoon lemon zest for brightness
- 1/4 cup chopped nuts (pecans or walnuts) for crunch
- 1 tablespoon flaxseed meal for added fiber
Ways to Serve Buttermilk Waffles
I love serving buttermilk waffles in a classic style with a drizzle of maple syrup, a pat of butter melting into the squares, and a dusting of powdered sugar. It feels comforting, homey, and always makes me feel like a child again.
I also enjoy waffles in a more creative way by layering them with yogurt, granola, and fruit to make a parfait-like plate. This turns breakfast into a balanced meal with a mix of crunch, creaminess, and freshness. It’s beautiful to look at and satisfying to eat.
For special occasions, I like making waffles into a dessert. A scoop of vanilla ice cream, some hot fudge, and a cherry on top turn them into a sundae you can eat with a fork. It’s indulgent and fun, making waffles a treat beyond breakfast.
Is Buttermilk Waffles Healthy?
Buttermilk waffles are not the healthiest breakfast option, but they can fit into a balanced lifestyle. They provide carbohydrates for energy and some protein from eggs and milk.
However, they are higher in sugar and fat, especially if served with syrup and whipped cream. To make them healthier, use whole wheat flour, reduce the sugar, or top with fruit instead of heavy toppings.
Variations and Substitutions
- Whole Wheat Waffles – Replace half or all the flour with whole wheat flour for a nutty flavor and extra fiber without losing fluffiness.
- Dairy-Free Version – Use almond or oat milk with a tablespoon of lemon juice as a buttermilk substitute, plus dairy-free butter.
- Gluten-Free Waffles – Swap regular flour with a 1:1 gluten-free flour blend. Add an extra egg to help with structure.
- Savory Waffles – Omit sugar and vanilla, then mix in herbs and shredded cheese for a brunch side that pairs well with eggs.
- Protein Waffles – Stir in a scoop of protein powder and reduce flour slightly for fitness-friendly waffles.
- Vegan Waffles – Use flax eggs, plant-based milk with vinegar, and vegan butter for a fully plant-based recipe.
- Cinnamon Roll Waffles – Add cinnamon and swirl in a cream cheese glaze after cooking for a sweet twist.
- Pumpkin Spice Waffles – Mix in pumpkin puree and warm spices for a cozy fall version.
How to Store and Reheat
If you have leftovers, allow the waffles to cool completely before storing. Place them in a single layer inside an airtight container, separating layers with parchment paper. They keep well in the refrigerator for 2–3 days or in the freezer for up to 2 months.
To reheat, avoid the microwave as it makes them soft. Instead, pop them in a toaster or a 350°F oven for a few minutes until warmed and crisp again. This way they taste almost as fresh as the day you made them.
Frequently Asked Questions about
Buttermilk Waffles
Can I use milk instead of buttermilk?
Yes, you can mix milk with a tablespoon of lemon juice or vinegar to mimic buttermilk’s tang. Let it sit for 10 minutes before using for the best result.
Why are my waffles sticking to the iron?
Usually, the iron wasn’t hot enough or not greased properly. Always preheat fully, brush with butter, and avoid opening the lid too soon while cooking.
Can I freeze cooked waffles?
Yes, once cooled, freeze in layers with parchment paper. They can last up to 2 months and can be toasted straight from frozen for convenience.
How do I make them extra crispy?
Add a tablespoon of cornstarch to the dry mix and cook them a little longer in the iron. Placing them on a wire rack instead of stacking also helps maintain crispness.

Buttermilk Waffles
Ingredients
- 2 cups all-purpose flour
- 2 tablespoons granulated sugar
- 2 teaspoons baking powder
- 1 teaspoon baking soda
- 1/2 teaspoon salt
- 2 large eggs
- 2 cups buttermilk well-shaken
- 1/2 cup unsalted butter melted and slightly cooled
- 1 teaspoon vanilla extract
Instructions
- Preheat the waffle iron:
- Plug in your waffle iron and allow it to preheat fully while you prepare the batter. Lightly grease it with nonstick spray or melted butter to prevent sticking.
- Mix the dry ingredients:
- In a large mixing bowl, whisk together the flour, sugar, baking powder, baking soda, and salt until evenly combined. This ensures the leavening agents are well distributed for fluffy waffles.
- Prepare the wet mixture:
- In a separate medium bowl, beat the eggs lightly. Add the buttermilk, melted butter, and vanilla extract, whisking until the mixture is smooth and uniform.
- Combine wet and dry ingredients:
- Make a well in the center of the dry mixture and slowly pour in the wet mixture. Gently fold the batter together with a spatula until just combined. Do not overmix—small lumps are perfectly fine and help the waffles stay tender. Let the batter rest for 5 minutes while your waffle iron continues to heat.
- Cook the waffles:
- Pour batter into the center of the hot waffle iron (amount will vary depending on your waffle maker). Close the lid and cook according to manufacturer’s instructions, usually 3–5 minutes, until golden brown and crisp. Carefully remove the waffle and place it on a wire rack to prevent sogginess while cooking the rest.
- Serve warm:
- Stack the waffles on a platter and serve immediately with your favorite toppings such as butter, maple syrup, fresh fruit, or whipped cream. For an extra treat, drizzle with chocolate sauce or sprinkle with powdered sugar.

Leave a Reply