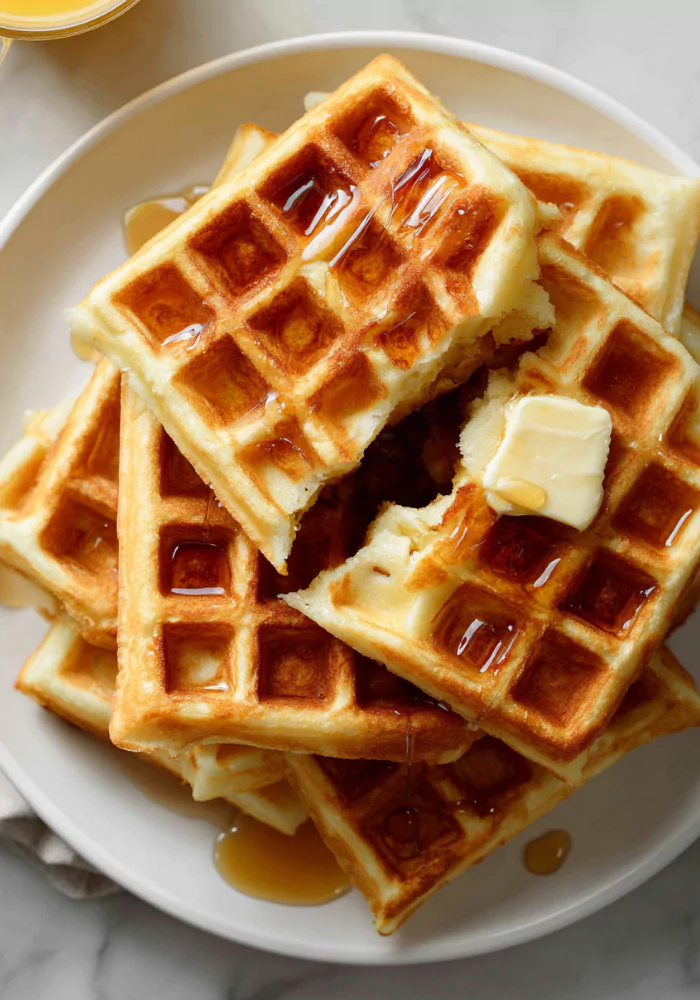
Last week I made these waffles on a Sunday morning, but what surprised me most is how light they were compared to regular ones. The flavor is rich, slightly sweet, and the texture holds up perfectly even when topped with fruit and syrup. It’s proof that gluten-free doesn’t mean you have to give up comfort foods—it just means making small adjustments with ingredients.
I have been experimenting with gluten-free baking for a while, and I found that a good flour blend is the secret. I use a gluten-free all-purpose flour mix with xanthan gum included. Always check the label, because not every blend behaves the same. Using this type of flour gives you structure, so the waffles don’t fall apart or feel too dense.

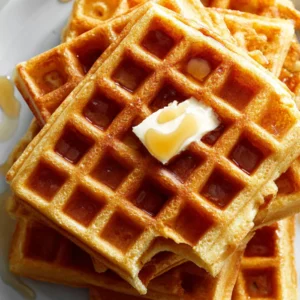
You can serve these waffles with a drizzle of maple syrup, some fresh berries, also with a dollop of whipped cream. If you’re feeling creative, add nut butter or even a scoop of vanilla yogurt. They are versatile enough to work for both sweet and savory toppings.
Its Perfect For:
- Weekend brunch with the family.
- A cozy breakfast in bed.
- Serving at kids’ sleepovers.
- A quick weekday meal when frozen ahead.
- Impressing guests with homemade treats.
Ingredients
- 2 cups gluten-free all-purpose flour blend (with xanthan gum)
- 2 tablespoons granulated sugar
- 2 teaspoons baking powder
- 1/2 teaspoon baking soda
- 1/2 teaspoon salt
- 2 large eggs
- 1 3/4 cups milk (dairy or non-dairy)
- 1/4 cup melted butter or coconut oil
- 1 teaspoon vanilla extract
Kitchen Equipment You’ll Need
- Mixing bowls (one large, one medium).
- Whisk and spatula.
- Measuring cups and spoons.
- A waffle iron (non-stick preferred).
- Wire rack and baking sheet (for keeping waffles warm).
How to make Gluten-Free Waffles
Step 1
Prepare the dry mix: In a large mixing bowl, whisk together the gluten-free flour, sugar, baking powder, baking soda, and salt. Make sure to break up any clumps so the mixture is light and evenly combined.
Step 2
Mix wet ingredients: In a separate bowl, beat the eggs until frothy. Add the milk, melted butter (or coconut oil), and vanilla extract, whisking until smooth. This helps the waffles cook evenly and gives them a fluffy texture.
Step 3
Combine the batter: Slowly pour the wet mixture into the dry ingredients, stirring gently with a spatula or wooden spoon. Do not overmix—the batter should be slightly lumpy but well-blended. If it looks too thick, add 1–2 tablespoons of milk to thin it out.
Step 4
Preheat waffle iron: While the batter rests for a couple of minutes, preheat your waffle iron according to the manufacturer’s instructions. Lightly grease the plates with oil or non-stick spray to ensure the waffles release easily.
Step 5
Cook the waffles: Pour enough batter onto the hot waffle iron to cover about two-thirds of the surface (the batter will spread). Close the lid and cook for 4–6 minutes, or until the waffle is golden brown and crisp on the outside. Avoid opening the waffle maker too soon, as this can cause sticking.
Step 6
Keep warm and serve: As you finish cooking each waffle, place them on a wire rack set on a baking sheet in a 200°F (90°C) oven to keep them warm and crisp until ready to serve. Stack them high and enjoy while fresh.
Tips for the Best Gluten-Free Waffles
- Choose the right flour blend. Not all gluten-free flours are equal. Use a blend with xanthan gum for structure, otherwise your waffles might crumble. Always read the packaging before buying.
- Let the batter rest. After mixing, allow it to sit for 5–10 minutes. This gives the flour time to absorb moisture, resulting in a smoother, fluffier texture when cooked.
- Avoid overmixing. Stir just until the ingredients come together. Overmixing can make the batter gummy, which leads to dense waffles instead of light ones.
- Preheat your waffle iron. A hot iron ensures the batter cooks evenly and helps the outside crisp up beautifully without sticking to the plates.
- Don’t lift the lid too soon. Patience is key—wait until steam stops escaping before checking. Opening early can cause the waffles to tear apart.
- Keep waffles warm correctly. Place finished waffles on a wire rack in a 200°F oven. Avoid stacking them directly, as this traps steam and makes them soggy.
- Experiment with toppings. From savory add-ons like fried eggs to sweet fruit sauces, the right topping can transform a simple waffle into something memorable.
Optional Ingredients
- Cinnamon for warmth and spice.
- Lemon zest for brightness.
- Shredded coconut for texture.
- Chopped nuts (almonds, pecans, walnuts).
- Chocolate chips for sweetness.
- Ground flaxseed for added nutrition.
How to Serve Gluten-Free Waffles
I love serving gluten-free waffles stacked high with strawberries and a drizzle of honey. The sweetness of the fruit balances the crisp texture, creating a refreshing bite with every forkful. It feels indulgent but still wholesome, especially when paired with a cup of coffee or tea.
I sometimes go the savory route, topping the waffles with scrambled eggs, avocado slices, and a sprinkle of cheese. This transforms them into a satisfying meal that works for brunch or even dinner when you want something quick but hearty. It’s filling and gives you that comfort-food vibe without being heavy.
I also enjoy making dessert waffles by adding a scoop of ice cream, crushed nuts, and a drizzle of chocolate sauce. It’s playful and fun, perfect for entertaining friends who may not even notice they’re eating gluten-free. Kids especially love this option because it feels like a treat.
Is Gluten-Free Waffles Healthy?
Gluten-free waffles can be a healthy option if you use nutrient-rich ingredients. Choosing non-dairy milk, natural sweeteners, and adding flaxseed or chia seeds boosts their nutritional value without sacrificing taste.
However, not all gluten-free products are automatically healthy. Some flour blends are high in starch and low in fiber. The key is balancing them with wholesome toppings like fresh fruit, yogurt, or nut butter to make them a balanced meal.
Variations and Substitutions
- Dairy-Free Version – Replace regular milk with almond or oat milk and butter with coconut oil. This keeps them light and suitable for lactose-intolerant eaters.
- Egg-Free Waffles – Use flax eggs (1 tablespoon ground flax + 3 tablespoons water) as a replacement. They’ll still hold together without losing texture.
- Savory Herb Waffles – Add chopped parsley, thyme, or rosemary into the batter. These pair beautifully with fried chicken or roasted vegetables.
- Pumpkin Spice Waffles – Mix pumpkin puree and spices like cinnamon, nutmeg, and ginger. Perfect for autumn mornings.
- Chocolate Waffles – Add cocoa powder and chocolate chips. Serve with whipped cream for a decadent treat.
- Banana Waffles – Mash ripe bananas into the batter for natural sweetness and extra moisture.
- Protein Waffles – Add a scoop of protein powder to the dry mix. Great for post-workout meals that keep you energized.
- Blueberry Waffles – Fold fresh or frozen blueberries into the batter. They burst with flavor as they cook inside.
How to Store and Reheat Gluten-Free Waffles
To store, allow the waffles to cool completely on a wire rack. Place them in an airtight container or freezer bag, separating each waffle with parchment paper to prevent sticking. They will last up to 3 days in the fridge and 2 months in the freezer.
To reheat, place waffles in a toaster or oven at 350°F until warmed and crisp again. Avoid microwaving, as this makes them rubbery. Freezer waffles can go straight into the toaster for a quick breakfast.
Frequently Asked Questions about Gluten-Free Waffles
Can I make the batter ahead of time? Yes, but it’s best used within 24 hours. Keep it covered in the refrigerator to avoid drying out, and stir gently before cooking.
Can I freeze the cooked waffles? Absolutely. Freeze them in layers with parchment paper in between. When ready, toast or bake directly from frozen for a quick meal.
What milk works best for this recipe? Any type of milk works—cow’s milk, almond, oat, or soy. Plant-based milks add a subtle flavor difference, so choose one you enjoy.
How do I stop waffles from sticking? Always preheat your waffle iron and lightly grease it before adding the batter. Using too little fat or opening too early can cause sticking.
Gluten-Free Waffles
Ingredients
- 2 cups gluten-free all-purpose flour blend with xanthan gum
- 2 tablespoons granulated sugar
- 2 teaspoons baking powder
- 1/2 teaspoon baking soda
- 1/2 teaspoon salt
- 2 large eggs
- 1 3/4 cups milk dairy or non-dairy
- 1/4 cup melted butter or coconut oil
- 1 teaspoon vanilla extract
Instructions
- Prepare the dry mix: In a large mixing bowl, whisk together the gluten-free flour, sugar, baking powder, baking soda, and salt. Make sure to break up any clumps so the mixture is light and evenly combined.
- Mix wet ingredients: In a separate bowl, beat the eggs until frothy. Add the milk, melted butter (or coconut oil), and vanilla extract, whisking until smooth. This helps the waffles cook evenly and gives them a fluffy texture.
- Combine the batter: Slowly pour the wet mixture into the dry ingredients, stirring gently with a spatula or wooden spoon. Do not overmix—the batter should be slightly lumpy but well-blended. If it looks too thick, add 1–2 tablespoons of milk to thin it out.
- Preheat waffle iron: While the batter rests for a couple of minutes, preheat your waffle iron according to the manufacturer’s instructions. Lightly grease the plates with oil or non-stick spray to ensure the waffles release easily.
- Cook the waffles: Pour enough batter onto the hot waffle iron to cover about two-thirds of the surface (the batter will spread). Close the lid and cook for 4–6 minutes, or until the waffle is golden brown and crisp on the outside. Avoid opening the waffle maker too soon, as this can cause sticking.
- Keep warm and serve: As you finish cooking each waffle, place them on a wire rack set on a baking sheet in a 200°F (90°C) oven to keep them warm and crisp until ready to serve. Stack them high and enjoy while fresh.
Leave a Reply