My kids were skeptical the first time I offered them these tiny eggs, but once they tried them, they were hooked! Now they call them “mini magic eggs.” What makes this recipe so fun is how customizable it is — you can make them spicy, herby, or sweet, depending on your mood. The vinegar base gives that bright, tangy kick, while the beet slice turns them into the prettiest pink eggs you’ve ever seen. Pickled quail eggs recipe look fancy but are actually very easy to make, and they last for weeks in your fridge.
I have always loved simple kitchen projects that bring color and flavor together. I use a blend of white vinegar, sugar, salt, peppercorns, and garlic, and I always add a slice of beet for a festive pink tone. Always make sure your jars are clean and your eggs peeled gently. Quail eggs are delicate, and a little patience goes a long way toward keeping them perfectly smooth and intact.
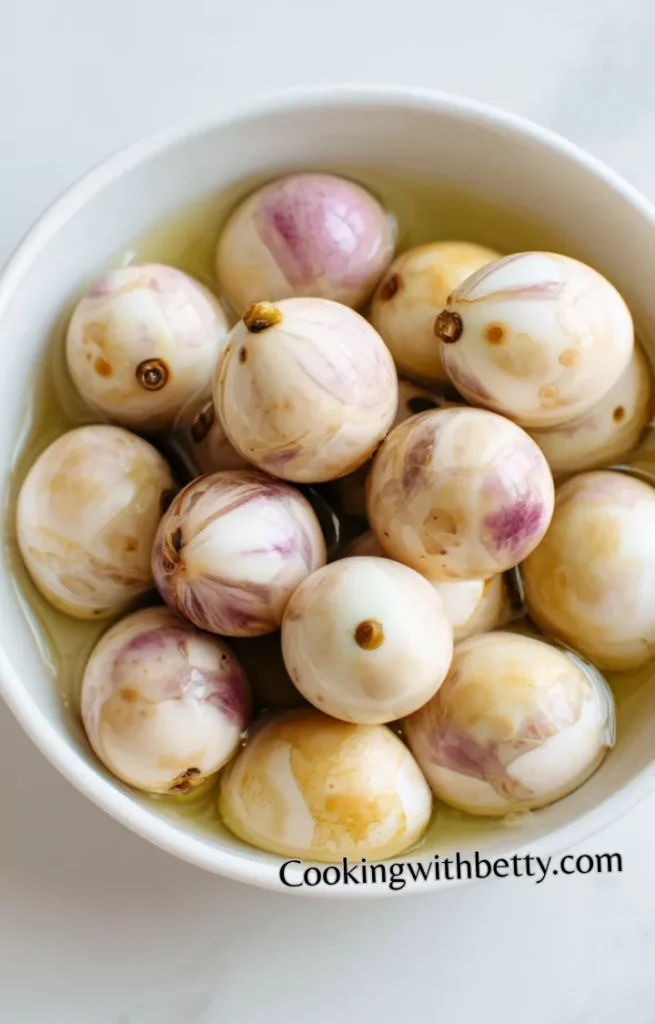
You can serve these delightful eggs as a snack at parties, some on charcuterie boards, also with fresh salads, cheese, or even beside grilled meats for a tangy touch. They’re fun to prepare, beautiful to look at, and incredibly satisfying to eat.
Its Perfect For:
- Party appetizers and Halloween snacks
- Colorful grazing boards and charcuterie platters
- Adding flavor to ramen or rice bowls
- Protein-rich on-the-go snacks
- Gifting in decorative jars for holidays
Ingredients
- 20 quail eggs
- 1 cup white vinegar
- 1/2 cup water
- 1 tablespoon sugar
- 1 teaspoon salt
- 3 cloves garlic, sliced
- 1 teaspoon black peppercorns
- 1 teaspoon mustard seeds
- 1/2 teaspoon chili flakes (optional for heat)
- 1 small bay leaf
- 1 small beet (optional, for pink color)
Kitchen Equipment You’ll Need
- Medium saucepan
- Measuring cups and spoons
- Mixing bowl
- Slotted spoon
- Knife and cutting board
- Clean glass jar with lid
- Strainer or mesh spoon
How to Make Pickled Quail Eggs?
Step 1
Boil the quail eggs: Bring a pot of water to a gentle boil and carefully lower the quail eggs using a spoon. Boil for about 4 minutes, then transfer them immediately into a bowl of ice water to stop the cooking. Once cool, gently peel the eggs — quail shells can be delicate, so it helps to lightly roll them on the counter before peeling.
Step 2
Prepare the pickling brine: In a small saucepan, combine vinegar, water, sugar, salt, garlic, peppercorns, mustard seeds, chili flakes, and bay leaf. If you’d like a beautiful pink hue, add a few slices of beet. Bring this mixture to a boil, then reduce the heat and let it simmer for about 3–4 minutes, stirring occasionally until the sugar and salt dissolve completely.
Step 3
Combine and pickle: Place the peeled quail eggs in a clean glass jar. Carefully pour the hot brine over the eggs, making sure they are fully submerged. If using beet, you’ll notice the color gradually infuse into the eggs over time. Allow the jar to cool to room temperature before sealing it tightly.
Step 4
Refrigerate and wait: Store the jar in the refrigerator for at least 3 days before eating. The longer you let them sit, the stronger and tangier the flavor becomes. After about 5 days, the eggs will have fully absorbed the brine and will be perfectly seasoned and ready to serve.
Tips for Making the Best Pickled Quail Eggs
- Handle the eggs gently. Quail eggs have thin shells, so always lower them slowly into boiling water to avoid cracks. Use a spoon or small ladle for safety.
- Ice water is your friend. Transferring the eggs into an ice bath stops the cooking and helps the shell slip off more easily without tearing the egg white.
- Peel with care. Gently roll each egg on the counter before peeling. If you find it tricky, soak them again in warm water to loosen the shell membrane.
- Simmer the brine properly. Allow your vinegar mixture to simmer for 3–4 minutes to bring out the full flavor of the garlic, peppercorns, and other spices.
- Don’t skip sterilizing. Clean jars are essential. Rinse with boiling water or place in a warm oven to dry before adding the eggs and brine.
- Wait for full flavor. Although tempting, don’t eat them right away. The flavor deepens beautifully after 3 to 5 days in the fridge.
- Try small batches. If it’s your first time, make a small jar first. It’s easier to experiment with flavors and colors that suit your taste.
Optional Ingredients
- A slice of beetroot for natural pink color.
- A few chili flakes or jalapeño slices for heat.
- Dill sprigs for a herby touch.
- A teaspoon of turmeric for golden color.
- Red onion slices for mild sweetness.
- Coriander seeds for a lemony aroma.
How to Serve Pickled Quail Eggs?
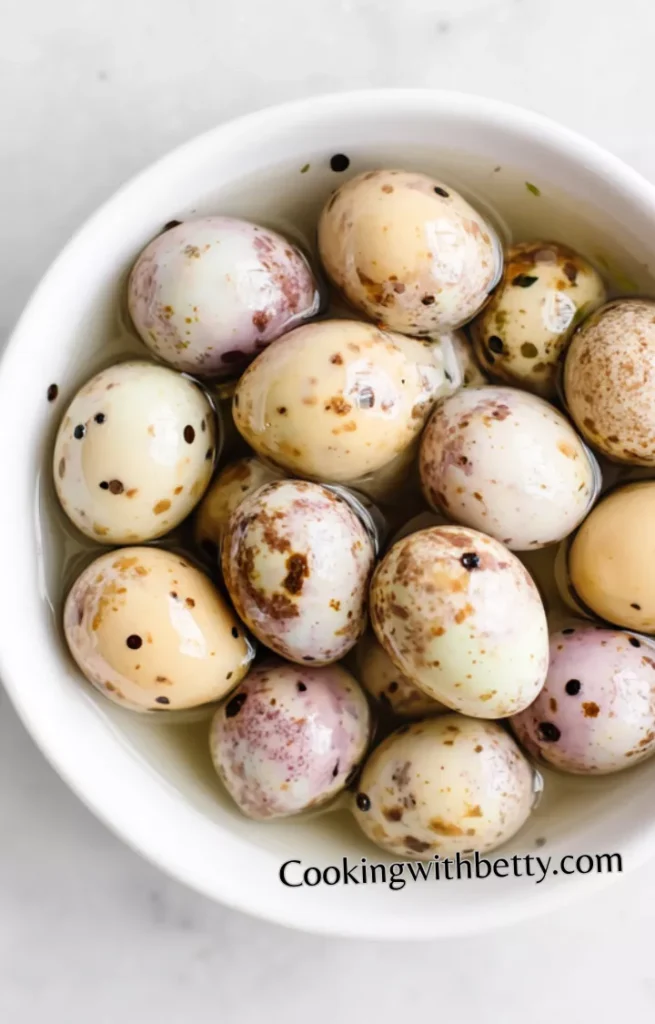
I love serving pickled quail eggs when friends come over. They always start with a curious look and end up asking for the recipe. Arrange them in a small bowl with toothpicks or in a pretty jar so guests can help themselves. The colors alone make them a conversation starter. They pair perfectly with cold drinks, cheese boards, and finger foods.
I also like adding them to salads and rice bowls. Slice them in half and place them over leafy greens or roasted vegetables for a bright pop of flavor. Their tanginess balances out rich ingredients like avocado, cheese, or dressing. Sometimes I even toss them with olive oil, herbs, and a pinch of chili flakes for a quick side dish.
For fancier meals, serve them with roasted meats or sandwiches. They make a delicious contrast to smoky or salty flavors. Try them on top of avocado toast or grain bowls — they add both visual appeal and a zesty finish. If you love cocktails, they even make a unique garnish for Bloody Marys. Trust me, they’re the kind of snack that always leaves people pleasantly surprised.
Is Pickled Quail Eggs Healthy?
Yes, they’re quite healthy! Quail eggs are rich in protein, vitamin B12, and antioxidants, making them a nourishing snack. The vinegar in the brine can aid digestion and acts as a natural preservative, keeping the eggs fresh for weeks.
However, because the brine can be salty or slightly sweet, it’s best to enjoy them in moderation. A few eggs a day is a perfect way to get protein without overdoing it. They’re much lighter than fried or creamy snacks, so they’re a wonderful alternative for guilt-free nibbling.
Variations and Substitutions
- Spicy Garlic Eggs
Add extra chili flakes and a clove of crushed garlic for bold, fiery bites that wake up your taste buds. - Sweet & Tangy Eggs
Use apple cider vinegar and a spoonful of honey or maple syrup for a gentler, sweeter version. - Asian-Style Quail Eggs
Swap vinegar for rice vinegar and add soy sauce, ginger, and sesame oil for a savory twist. - Dill & Mustard Brine
Add dill sprigs and mustard seeds for a flavor reminiscent of classic deli pickles. - Turmeric Infusion
A pinch of turmeric gives your eggs a sunshine-yellow glow and adds subtle earthy flavor. - Beet-Pink Delight
Add beet slices for that eye-catching color and gentle sweetness. Perfect for Easter or romantic dinners. - Smoky Peppercorn Pickle
Use smoked paprika and cracked pepper for a rustic, smoky finish. - Mediterranean Blend
Add olive oil, thyme, and oregano for a light, herbal taste perfect for serving with bread or cheese.
How to Store and How to Reheat
To store, always keep your pickled quail eggs in a sterilized glass jar with a tight lid. The eggs should remain fully submerged in the brine to maintain their texture and freshness. Store them in the refrigerator — they can last for up to three months if sealed properly. Avoid metal containers, as vinegar can corrode them and affect the flavor.
You don’t need to reheat pickled eggs because they’re best enjoyed cold or at room temperature. But if you want to serve them slightly warm, place the jar in a bowl of warm (not hot) water for a few minutes before serving. Never microwave them; it changes the texture and might cause them to burst.
Frequently Asked Questions About Pickled Quail Eggs
How long should I wait before eating pickled quail eggs?
Wait at least 3 days for the flavors to develop, though 5 days gives the best taste and color. The longer they sit, the tangier and more flavorful they become.
Can I reuse the leftover brine?
It’s not recommended because the old brine loses its acidity and can harbor bacteria. Always make a fresh batch when reusing jars.
What type of vinegar is best for pickled eggs?
White vinegar gives a classic sharp taste, while apple cider vinegar offers a softer, fruitier note. Rice vinegar works beautifully for a mild, Asian-style version.
Can I make pickled eggs without sugar?
Yes, but sugar balances the acidity and rounds out the flavor. If you prefer, use a little honey or stevia instead for a natural sweetness.
Pickled Quail Eggs
Ingredients
- 20 quail eggs
- 1 cup white vinegar
- 1/2 cup water
- 1 tablespoon sugar
- 1 teaspoon salt
- 3 cloves garlic sliced
- 1 teaspoon black peppercorns
- 1 teaspoon mustard seeds
- 1/2 teaspoon chili flakes optional for heat
- 1 small bay leaf
- 1 small beet optional, for pink color
Instructions
- Boil the quail eggs: Bring a pot of water to a gentle boil and carefully lower the quail eggs using a spoon. Boil for about 4 minutes, then transfer them immediately into a bowl of ice water to stop the cooking. Once cool, gently peel the eggs — quail shells can be delicate, so it helps to lightly roll them on the counter before peeling.
- Prepare the pickling brine: In a small saucepan, combine vinegar, water, sugar, salt, garlic, peppercorns, mustard seeds, chili flakes, and bay leaf. If you’d like a beautiful pink hue, add a few slices of beet. Bring this mixture to a boil, then reduce the heat and let it simmer for about 3–4 minutes, stirring occasionally until the sugar and salt dissolve completely.
- Combine and pickle: Place the peeled quail eggs in a clean glass jar. Carefully pour the hot brine over the eggs, making sure they are fully submerged. If using beet, you’ll notice the color gradually infuse into the eggs over time. Allow the jar to cool to room temperature before sealing it tightly.
- Refrigerate and wait: Store the jar in the refrigerator for at least 3 days before eating. The longer you let them sit, the stronger and tangier the flavor becomes. After about 5 days, the eggs will have fully absorbed the brine and will be perfectly seasoned and ready to serve.
Leave a Reply