I like crispy chicken, but what makes Raising Cane’s Chicken special is the perfect balance between crunch and tenderness, and how the sauce brings everything together in one bite. It is not just fried chicken; it is the experience of dipping, sharing, and enjoying it hot. This copycat recipe captures that feeling and makes it possible to enjoy it anytime.
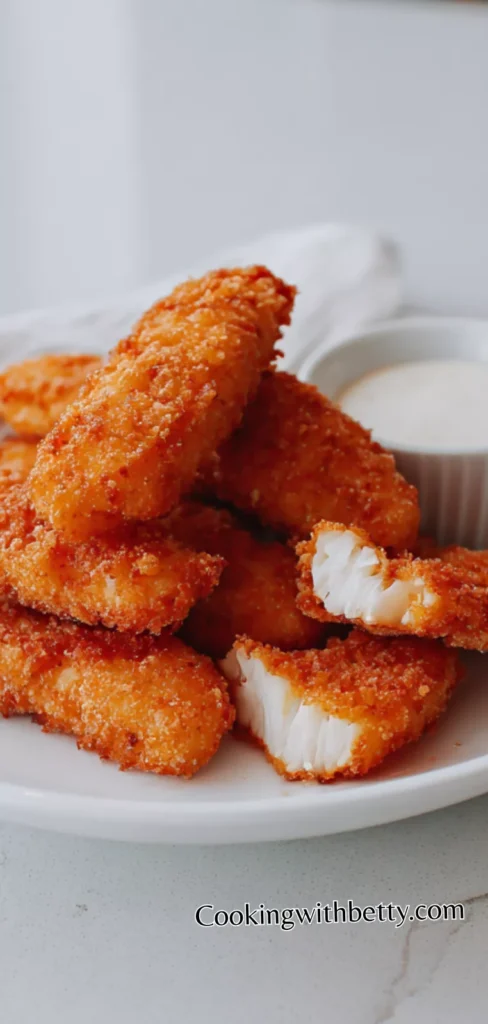
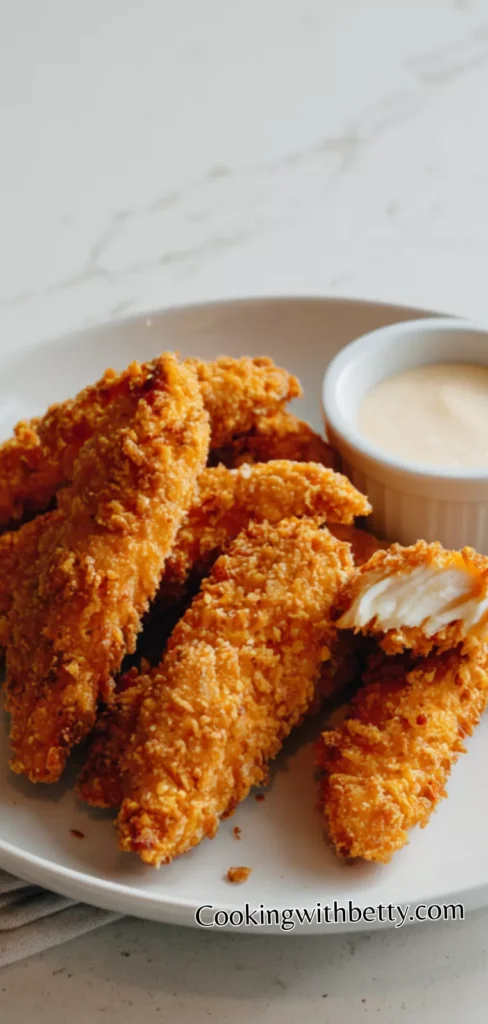
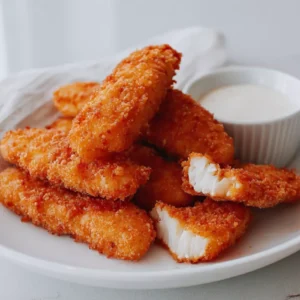
There is something truly comforting about Raising Cane’s Chicken. The crispy golden coating, the juicy chicken inside, and the creamy, peppery sauce make it hard to resist. This recipe brings that famous fast-food flavor straight into your kitchen using simple ingredients and easy steps. I love how it feels like a treat while still being homemade, fresh, and comforting.
I have cooked many chicken recipes over the years, and I use good oil, simple seasoning, and proper frying temperature always. These small details make a huge difference in the final result. When done right, the chicken turns out golden, juicy, and full of flavor every single time.
You can serve this chicken with crispy fries, some creamy coleslaw, also with soft Texas toast and extra sauce on the side. It is the kind of meal that brings smiles and keeps everyone coming back for more.
Its Perfect For:
- Family dinners: Easy to prepare in larger portions. Loved by both kids and adults. Simple flavors everyone enjoys.
- Weekend cravings: Brings fast-food flavor home. No need to order out. Feels comforting and indulgent.
- Game nights: Perfect finger food. Easy to dip and share. Always a crowd favorite.
- Casual gatherings: Relaxed and familiar meal. Looks inviting on the table. Simple to serve.
- Comfort food moments: Warm and satisfying. Familiar flavors. Always comforting.
Ingredients
Chicken Fingers
- 2 lbs chicken tenderloins
- 1 cup buttermilk
- 1 egg
- 1 teaspoon garlic powder
- 1 teaspoon onion powder
- 1/2 teaspoon paprika
- 1/2 teaspoon black pepper
- 1 teaspoon salt
- 2 cups all-purpose flour
- 1/2 cup cornstarch
- Vegetable oil, for frying
Cane’s-Style Sauce
- 1/2 cup mayonnaise
- 1/4 cup ketchup
- 1 teaspoon Worcestershire sauce
- 1/2 teaspoon garlic powder
- 1/2 teaspoon black pepper
- 1/4 teaspoon salt
Kitchen Equipment You’ll Need
- Large mixing bowls
- Whisk
- Shallow dish for dredging
- Deep skillet or heavy pot
- Tongs
- Cooking thermometer (optional)
- Paper towels or wire rack
How to Make Raising Cane’s Chicken
Step 1
Prepare the chicken marinade: In a large bowl, whisk together the buttermilk, egg, garlic powder, onion powder, paprika, salt, and black pepper until fully combined. Add the chicken tenderloins and gently stir to coat each piece evenly. Cover and refrigerate for at least 30 minutes; marinating longer helps keep the chicken juicy and flavorful.
Step 2
Make the flour coating: In a separate shallow bowl, mix the all-purpose flour and cornstarch until evenly blended. This combination creates the signature light yet crispy coating similar to Raising Cane’s chicken.
Step 3
Coat the chicken: Remove the marinated chicken from the refrigerator. One piece at a time, dredge each tender in the flour mixture, pressing lightly so the coating sticks well. Shake off any excess flour and place the coated chicken on a plate. Let it rest for about 5 minutes to help the coating adhere better during frying.
Step 4
Fry the chicken: Heat vegetable oil in a deep skillet or heavy pot to 350°F (175°C). Carefully lower the chicken tenders into the hot oil, frying in batches to avoid overcrowding. Cook for 6–8 minutes, turning occasionally, until golden brown, crispy, and fully cooked through. Transfer to a wire rack or paper towel-lined plate to drain excess oil.
Step 5
Prepare the Cane’s sauce: While the chicken rests, combine mayonnaise, ketchup, Worcestershire sauce, garlic powder, black pepper, and salt in a small bowl. Stir until smooth and creamy. Cover and refrigerate for at least 15 minutes to allow the flavors to blend, creating that classic Cane’s-style taste.
Step 6
Serve: Arrange the crispy chicken fingers on a serving plate and serve warm with the chilled Cane’s sauce on the side for dipping.
Tips for the Best Raising Cane’s Chicken
- Use buttermilk for marinating
It keeps the chicken juicy.
Helps tenderize the meat.
Improves overall flavor. - Let the coating rest
This helps the flour stick better.
Reduces coating loss while frying.
Improves crispiness. - Watch the oil temperature
Too hot burns the coating.
Too cool makes greasy chicken.
Keep it steady. - Fry in small batches
Prevents overcrowding.
Keeps oil temperature stable.
Ensures even cooking. - Add cornstarch to flour
Creates lighter crunch.
Improves texture.
Mimics fast-food coating. - Season every layer
Flavor the marinade and flour.
Prevents bland bites.
Builds depth. - Rest the sauce before serving
Blends flavors better.
Smooths out peppery notes.
Tastes richer.
Optional Ingredients
- Paprika for color
- White pepper for mild heat
- Cayenne for spice
- Pickle juice for tang
- Garlic salt
- Milk for lighter sauce
How to Serve Raising Cane’s Chicken?
I love serving Raising Cane’s Chicken fresh and hot, right after it comes out of the oil, because that is when the coating is at its crispiest and the chicken inside is still very juicy. I usually place the chicken fingers on a large serving platter lined with parchment paper and serve the sauce in a small bowl in the center for easy dipping.
I also like to turn it into a complete meal by adding classic sides that everyone expects. Crispy fries, creamy coleslaw, and warm Texas toast make the perfect combination and truly recreate the Raising Cane’s experience at home. I always add extra sauce on the side because it goes fast.
I sometimes serve this chicken in a casual, family-style way when friends come over. I place everything on the table, let everyone help themselves, and keep the atmosphere relaxed. It feels comforting, welcoming, and perfect for sharing.
Is Raising Cane’s Chicken Healthy?
Raising Cane’s Chicken is not considered a healthy meal because it is fried and higher in calories and fat. However, making it at home allows you to control the oil quality, portion sizes, and ingredients used.
When enjoyed occasionally and paired with lighter sides, it can fit into a balanced lifestyle. Homemade versions also avoid preservatives, making it a slightly better choice than takeout.
Variations and Substitutions
- Air fryer version
Uses less oil.
Still crispy.
Lighter texture.
Great alternative. - Oven-baked version
Lower in fat.
Needs higher heat.
Slightly softer coating.
Still tasty. - Spicy chicken
Add cayenne pepper.
Extra heat.
Bold flavor.
Sauce balances it. - Gluten-free option
Use gluten-free flour.
Add cornstarch.
Crunchy texture.
Easy swap. - Chicken breast strips
Cut fresh breasts.
Control size.
Leaner option.
Still juicy. - Dairy-free marinade
Use plant milk.
Add lemon juice.
Still tenderizes.
Works well. - Extra crispy coating
Double dredge.
Rest between coats.
Thick crust.
Very crunchy. - Sauce flavor twist
Add smoked paprika.
Slight sweetness or heat.
Creamy texture.
Fun variation.
How to Store and Reheat
Store leftover Raising Cane’s Chicken in an airtight container in the refrigerator for up to three days. Keep the sauce stored separately to maintain its fresh flavor and creamy texture.
To reheat, warm the chicken in the oven or air fryer at 375°F until heated through and crispy again. Avoid reheating in the microwave if possible, as it softens the coating.
Frequently Asked Questions About Raising Cane’s Chicken
Can I prepare Raising Cane’s Chicken ahead of time?
You can marinate and coat the chicken a few hours in advance, but frying it right before serving gives the best crispy texture and fresh taste.
What type of oil is best for frying this chicken?
Neutral oils such as vegetable, canola, or peanut oil work best because they handle high heat without affecting the flavor.
Can the sauce be made ahead of time?
The sauce can be prepared up to two days in advance and stored in the refrigerator, and the flavor improves as it rests.
Can I use frozen chicken tenders?
Frozen chicken can be used if fully thawed and dried, but fresh chicken gives the best texture and flavor.
Raising Cane’s Chicken
Ingredients
Chicken Fingers
- 2 lbs chicken tenderloins
- 1 cup buttermilk
- 1 egg
- 1 teaspoon garlic powder
- 1 teaspoon onion powder
- 1/2 teaspoon paprika
- 1/2 teaspoon black pepper
- 1 teaspoon salt
- 2 cups all-purpose flour
- 1/2 cup cornstarch
- Vegetable oil for frying
Cane’s-Style Sauce
- 1/2 cup mayonnaise
- 1/4 cup ketchup
- 1 teaspoon Worcestershire sauce
- 1/2 teaspoon garlic powder
- 1/2 teaspoon black pepper
- 1/4 teaspoon salt
Instructions
- Prepare the chicken marinade: In a large bowl, whisk together the buttermilk, egg, garlic powder, onion powder, paprika, salt, and black pepper until fully combined. Add the chicken tenderloins and gently stir to coat each piece evenly. Cover and refrigerate for at least 30 minutes; marinating longer helps keep the chicken juicy and flavorful.
- Make the flour coating: In a separate shallow bowl, mix the all-purpose flour and cornstarch until evenly blended. This combination creates the signature light yet crispy coating similar to Raising Cane’s chicken.
- Coat the chicken: Remove the marinated chicken from the refrigerator. One piece at a time, dredge each tender in the flour mixture, pressing lightly so the coating sticks well. Shake off any excess flour and place the coated chicken on a plate. Let it rest for about 5 minutes to help the coating adhere better during frying.
- Fry the chicken: Heat vegetable oil in a deep skillet or heavy pot to 350°F (175°C). Carefully lower the chicken tenders into the hot oil, frying in batches to avoid overcrowding. Cook for 6–8 minutes, turning occasionally, until golden brown, crispy, and fully cooked through. Transfer to a wire rack or paper towel-lined plate to drain excess oil.
- Prepare the Cane’s sauce: While the chicken rests, combine mayonnaise, ketchup, Worcestershire sauce, garlic powder, black pepper, and salt in a small bowl. Stir until smooth and creamy. Cover and refrigerate for at least 15 minutes to allow the flavors to blend, creating that classic Cane’s-style taste.
- Serve: Arrange the crispy chicken fingers on a serving plate and serve warm with the chilled Cane’s sauce on the side for dipping.
Leave a Reply