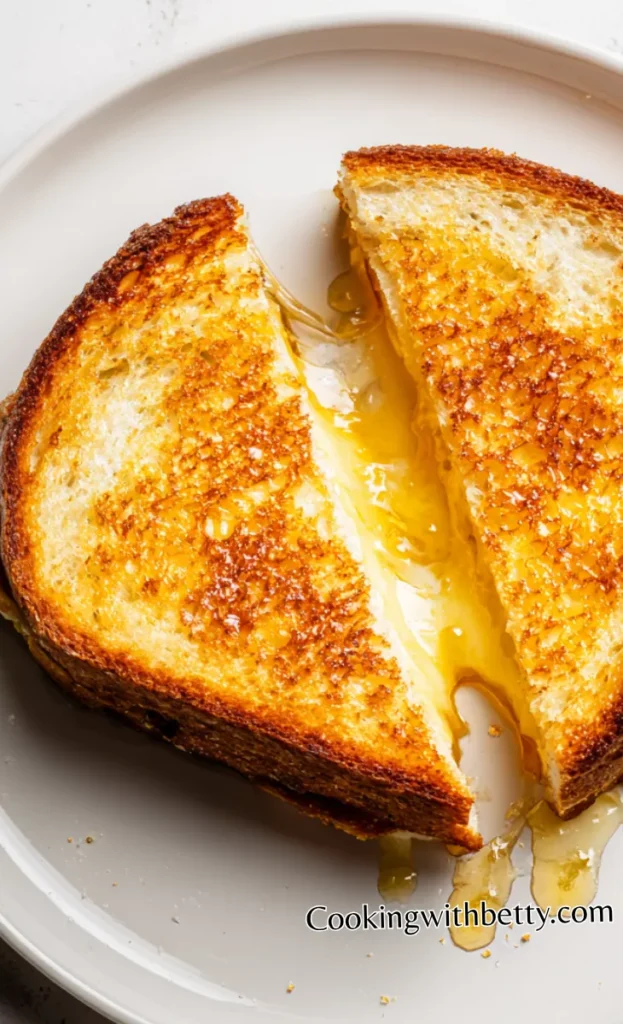
My husband usually prefers savory sandwiches, but when I made this version grilled cheese with honey, he was instantly hooked. The blend of melted cheddar and golden sweetness turned his simple breakfast into something indulgent yet homey. I still remember his first bite—he raised his eyebrows, smiled, and said, “You need to make this again.” In our home, that’s always a good sign. The honey adds just the right amount of sweetness that balances the salty richness of the cheese. It’s one of those easy recipes that you can whip up on a lazy morning or when you just need a little comfort food to brighten your day. Now it has become our weekend go-to meal, especially when we want something quick but satisfying.
I have made this recipe so many times that I can do it almost with my eyes closed. I use fresh sourdough bread because it’s sturdy and gives a perfect crisp on the outside while staying soft inside. Always use real butter—it makes such a difference in flavor and texture. As for the cheese, I often go for cheddar or gouda. Sometimes I drizzle a little extra honey before serving to create that glossy finish.
You can serve these sandwiches with a bowl of creamy tomato soup, some fresh green salad, also with a cup of hot coffee or iced tea. It’s great for breakfast, brunch, or even dinner when you just want something cozy without spending hours in the kitchen.
It’s Perfect For:
- Quick morning breakfasts when you’re short on time
- Lazy Sunday brunch with the family
- A comforting snack after work or study
- Packing in lunchboxes for a warm surprise
- Serving with soup on a rainy day
Ingredients
- 4 slices of your favorite bread (white, sourdough, or brioche)
- 4 slices of cheddar or American cheese
- 2 tablespoons unsalted butter, softened
- 2 teaspoons honey (plus extra for drizzling)
- A pinch of salt (optional)
Kitchen Equipment You’ll Need
- Non-stick skillet or griddle
- Spatula (for easy flipping)
- Butter knife or pastry brush
- Measuring spoons
- Small bowl (for mixing honey and butter, optional)
- Cutting board and sharp knife for slicing
How to Make Simple Grilled Cheese With Honey
Step 1
Prepare the bread: Spread softened butter evenly on one side of each bread slice. Make sure to coat the edges, so every bite comes out golden and crisp. Lightly sprinkle a pinch of salt over the buttered sides if you enjoy a sweet-salty balance.
Step 2
Assemble the sandwich: Lay two slices of bread butter-side down on a clean surface. Place two slices of cheese on each piece of bread. Drizzle about a teaspoon of honey over the cheese—this creates that lovely hint of sweetness that melts perfectly with the savory cheese. Top with the remaining slices of bread, buttered side facing out.
Step 3
Heat the pan: Warm a nonstick skillet or griddle over medium-low heat. Give it a minute or two to evenly heat up; this prevents burning and ensures your sandwich cooks evenly from edge to edge.
Step 4
Grill the sandwiches: Carefully place the sandwiches in the pan. Cook slowly for about 3–4 minutes per side, pressing gently with a spatula as they cook. You’ll notice the butter sizzling slightly and the edges turning golden brown. Flip only once to avoid losing that crisp crust. If the bread browns too quickly before the cheese melts, lower the heat slightly and cover the pan for 30 seconds.
Step 5
Finish and serve: Once both sides are beautifully toasted and the cheese is gooey and melted, remove the sandwiches from the pan. Let them rest for about a minute before slicing—this helps
Tips for the Best Grilled Cheese with Honey
- Use room-temperature butter. It spreads more evenly on the bread, helping it toast uniformly and preventing burnt spots.
- Low and slow cooking. Medium-low heat gives the cheese time to melt while keeping the bread golden, not burnt.
- Cheese choice matters. Use cheese that melts well—like cheddar, mozzarella, or Monterey Jack—for that perfect gooey texture.
- Press lightly with a spatula. This helps the bread brown evenly and ensures the cheese fully melts without squeezing it out.
- Add honey after cooking for extra gloss. Drizzling honey right before serving keeps the sweetness intact and avoids burning.
- Try a flavored butter. Mix butter with a pinch of cinnamon or a drizzle of honey before spreading—it elevates the flavor.
- Don’t rush cooling time. Let the sandwich sit for about a minute before cutting so the cheese settles and doesn’t spill out.
Optional Ingredients
- Thinly sliced apples for a sweet-crisp texture.
- A pinch of crushed chili flakes for heat.
- A few drops of lemon juice to cut the richness.
- Caramelized onions for a deeper, savory flavor.
- Fresh thyme or rosemary for an aromatic touch.
- A slice of ham or turkey for extra protein.
How to Serve Simple Grilled Cheese With Honey?
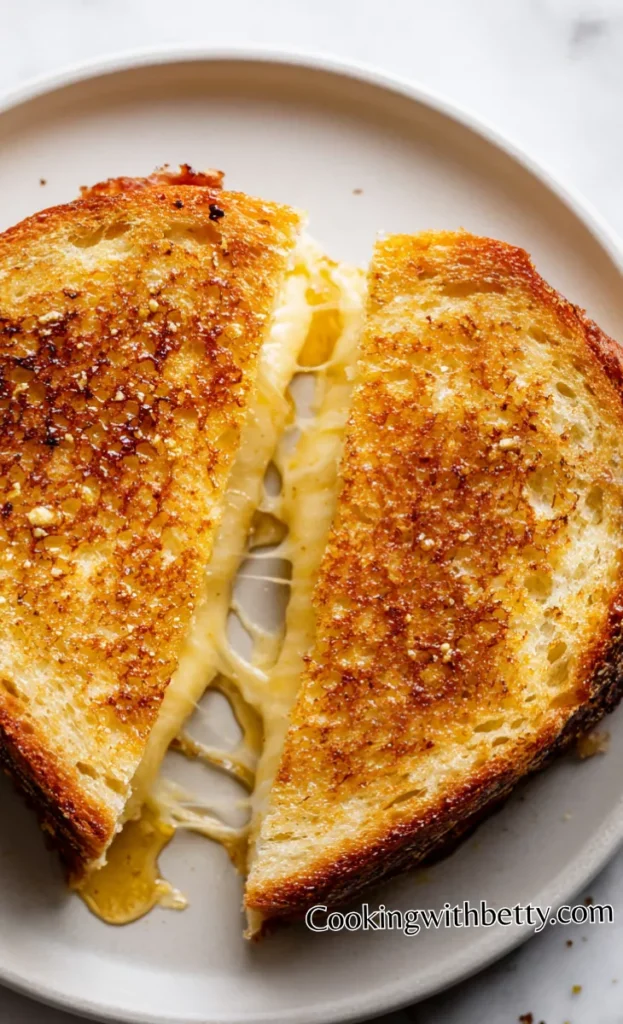
I love serving this sandwich while it’s still warm, right off the pan, with the cheese just beginning to stretch as you pull it apart. The best part is when the honey drips a little down the side—it looks glossy and inviting. I usually plate it on a small wooden board with a drizzle of honey beside it for dipping.
When I prepare it for guests, I cut the sandwiches into halves or triangles and serve them alongside a small bowl of tomato soup or creamy pumpkin soup. It gives that classic comfort-food pairing a subtle twist of sweetness. Add a few fresh fruit slices like apples or grapes for color and freshness.
If I’m making it for breakfast, I serve it with a hot cup of coffee or tea. The warm bread, melted cheese, and honey pair beautifully with a rich drink. It’s also a lovely breakfast-in-bed option—simple, cozy, and full of heart.
Is Simple Grilled Cheese With Honey Healthy?
It can be! While it’s definitely indulgent, you can make it healthier by using whole-grain bread, less butter, and a mild cheese with lower fat. The honey adds natural sweetness instead of refined sugar, which makes it a better alternative to sugary spreads.
You can also pair it with a side of vegetables or soup to make it more balanced. It’s about moderation—one sandwich gives you comfort, energy, and that touch of happiness we all need sometimes.
Variations and Substitutions
- Apple Cinnamon Version: Add thin apple slices and a sprinkle of cinnamon between the cheese for a warm, dessert-like flavor.
- Spicy Honey Grilled Cheese: Mix a few drops of hot sauce or chili flakes with the honey for a sweet-heat combination.
- Garlic Herb Butter: Use garlic herb butter instead of plain butter for a rich, savory twist.
- Three-Cheese Blend: Combine mozzarella, cheddar, and provolone for a more complex, melty bite.
- Whole Wheat Healthier Version: Swap white bread for whole-grain bread and use light cheese to cut calories.
- Ham and Honey Melt: Add thin slices of ham between cheese layers for a hearty, protein-packed meal.
- Brie and Fig Honey Melt: Replace cheddar with brie and drizzle with honey and fig jam for an elegant version.
- Air Fryer Shortcut: Air fry at 370°F for 5 minutes per side—less oil, same crisp perfection.
How to Store and How to Reheat
If you have leftovers, let the sandwiches cool completely before storing. Wrap them in foil or parchment paper and place them in an airtight container in the refrigerator for up to 2 days. Avoid sealing them while warm, as condensation can make the bread soggy.
To reheat, warm them in a skillet over low heat for 2–3 minutes on each side until the bread becomes crisp again and the cheese softens. You can also reheat them in an oven at 350°F for about 5 minutes. Avoid the microwave—it softens the bread and takes away that lovely crunch.
Frequently Asked Questions About Simple Grilled Cheese With Honey
Can I use vegan cheese?
Yes, absolutely! Just choose a vegan cheese that melts well—like coconut- or almond-based varieties. You can also use vegan butter and drizzle maple syrup instead of honey for a fully plant-based option. The texture will still be melty and satisfying.
Can I use margarine instead of butter?
You can, though butter gives a richer flavor and crispier crust. Margarine tends to have more water, so your bread might not brown as evenly. If you use margarine, keep the heat a little lower and cook slowly for best results.
What’s the best honey for this recipe?
I personally love using clover or wildflower honey because they’re mild and floral. For a bolder flavor, try dark buckwheat honey or even a spicy honey blend. Each type gives the sandwich a slightly different taste—sweet, floral, or deep and earthy.
Can I make this sandwich ahead of time?
Yes, but it’s best served fresh. If you need to make it in advance, prepare the sandwiches but don’t grill them yet. Store them in the fridge wrapped in plastic wrap, then cook them just before serving so the bread stays crisp and the cheese melts perfectly.

Simple Grilled Cheese With Honey
Ingredients
- 4 slices of your favorite bread white, sourdough, or brioche
- 4 slices of cheddar or American cheese
- 2 tablespoons unsalted butter softened
- 2 teaspoons honey plus extra for drizzling
- A pinch of salt optional
Instructions
- Prepare the bread: Spread softened butter evenly on one side of each bread slice. Make sure to coat the edges, so every bite comes out golden and crisp. Lightly sprinkle a pinch of salt over the buttered sides if you enjoy a sweet-salty balance.
- Assemble the sandwich: Lay two slices of bread butter-side down on a clean surface. Place two slices of cheese on each piece of bread. Drizzle about a teaspoon of honey over the cheese—this creates that lovely hint of sweetness that melts perfectly with the savory cheese. Top with the remaining slices of bread, buttered side facing out.
- Heat the pan: Warm a nonstick skillet or griddle over medium-low heat. Give it a minute or two to evenly heat up; this prevents burning and ensures your sandwich cooks evenly from edge to edge.
- Grill the sandwiches: Carefully place the sandwiches in the pan. Cook slowly for about 3–4 minutes per side, pressing gently with a spatula as they cook. You’ll notice the butter sizzling slightly and the edges turning golden brown. Flip only once to avoid losing that crisp crust. If the bread browns too quickly before the cheese melts, lower the heat slightly and cover the pan for 30 seconds.
- Finish and serve: Once both sides are beautifully toasted and the cheese is gooey and melted, remove the sandwiches from the pan. Let them rest for about a minute before slicing—this helps the cheese settle slightly and keeps it from oozing out. Drizzle a touch more honey on top if you like a glossy, sweet finish.


Leave a Reply