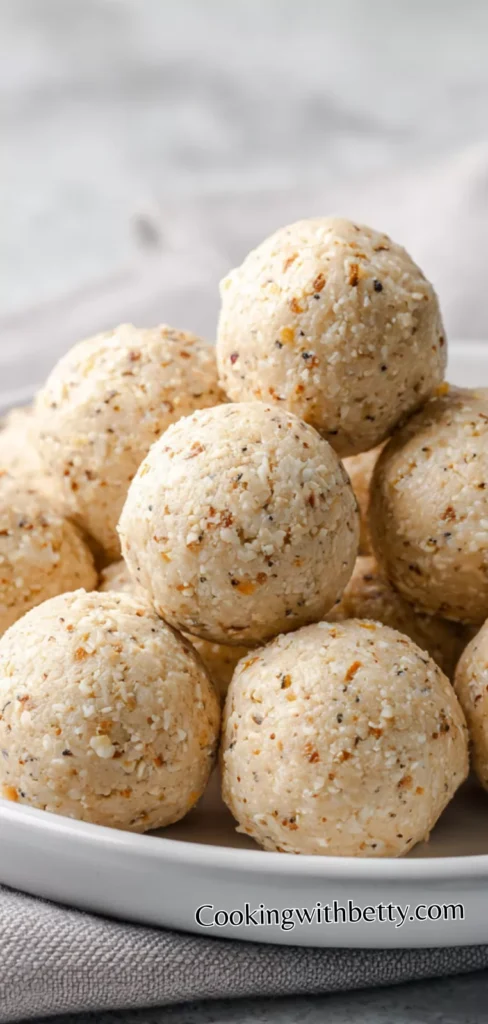
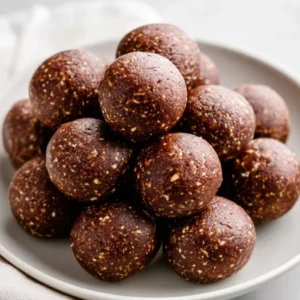
My kids absolutely love these protein balls, but what I find amazing is that in every batch, I can sneak in healthy ingredients without them noticing, and they enjoy them as much as any cookie or candy. If you are looking for a quick, healthy, and delicious snack, the No Bake Vanilla Protein Ball is perfect. These little bites are sweet, soft, and packed with energy, making them ideal for kids, busy moms, or anyone on the go. Unlike baked treats, they don’t need an oven, which saves you time while keeping your kitchen cool. Every bite is full of vanilla flavor, a hint of sweetness, and a satisfying texture from oats and nuts.
I have tried many recipes, but I use this one because it is simple, fast, and reliable every single time. Always remember to mix the wet and dry ingredients well to get a smooth dough. Rolling them into balls is the fun part, and it’s a great activity to do together with kids or friends.
You can serve these protein balls as a quick breakfast, some post-workout snack, or a sweet afternoon pick-me-up. They also go beautifully with a cup of tea or coffee. For a little extra, you can drizzle some melted dark chocolate on top or sprinkle coconut flakes for a pretty presentation.
Its Perfect For:
- Busy moms who need a quick snack
- Kids’ lunchboxes or after-school treats
- Post-workout protein boost
- Office or travel-friendly snack
- Anyone who loves a sweet but healthy bite
Ingredients
- 1 cup rolled oats
- 1/2 cup vanilla protein powder
- 1/4 cup almond butter (or peanut butter)
- 1/4 cup honey or maple syrup
- 1 teaspoon vanilla extract
- 2–3 tablespoons milk (dairy or plant-based)
- 1/4 cup mini chocolate chips or chopped nuts (optional)
- Pinch of salt
Kitchen Equipment You’ll Need
- Mixing bowls (one large for dry ingredients, one small for wet)
- Measuring cups and spoons
- Spatula or wooden spoon
- Parchment paper or plate for chilling
- Small saucepan (optional if melting chocolate or nut butter)
- Refrigerator for firming up the balls
How to Make No Bake Vanilla Protein Ball
Step 1
Mix dry ingredients: In a large mixing bowl, combine the rolled oats, vanilla protein powder, and a pinch of salt. Stir thoroughly so that the protein powder is evenly distributed and no clumps remain. This step ensures each bite has a consistent flavor and texture.
Step 2
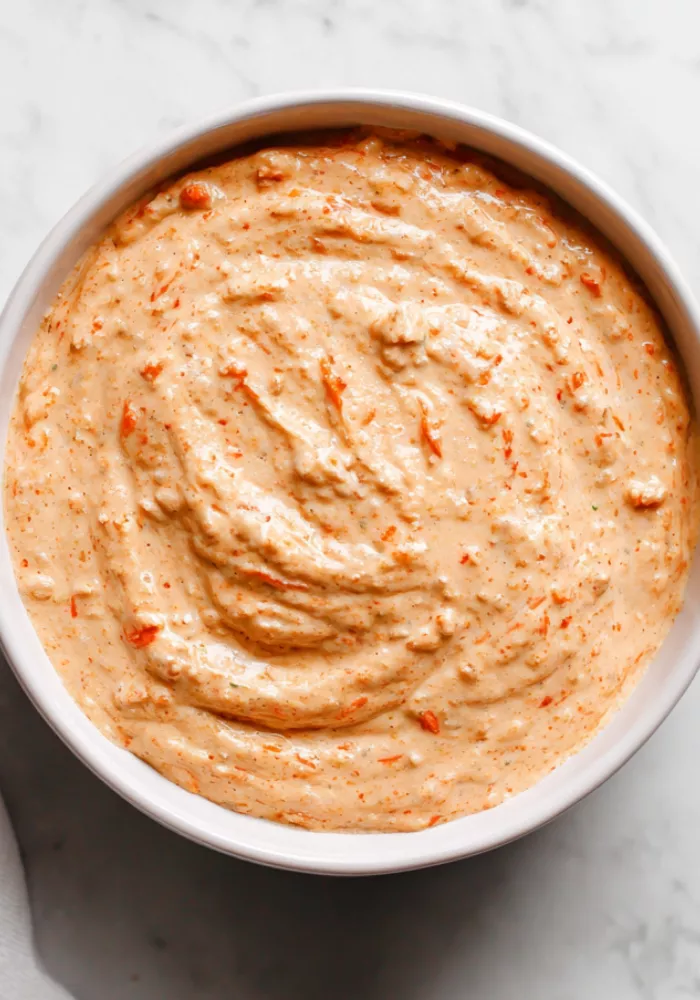
Combine wet ingredients: In a separate small bowl, mix the almond butter, honey, and vanilla extract until smooth. If the mixture is too thick, warm slightly in the microwave for 10–15 seconds to make it easier to stir.
Step 3
Form the dough: Pour the wet mixture into the bowl with the dry ingredients. Use a spatula or your hands to combine everything evenly. Gradually add milk, one tablespoon at a time, until the mixture comes together and can hold its shape when rolled. The dough should be slightly sticky but firm enough to form balls.
Step 4
Add mix-ins: If desired, fold in mini chocolate chips, chopped nuts, or dried fruit for extra flavor and texture. Make sure the mix-ins are evenly distributed so that each protein ball has a little surprise in every bite.
Step 5
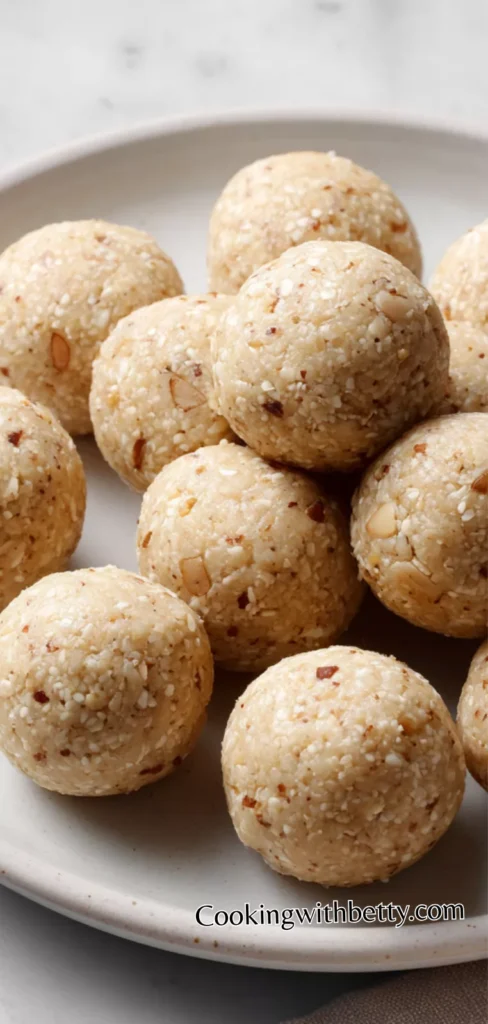
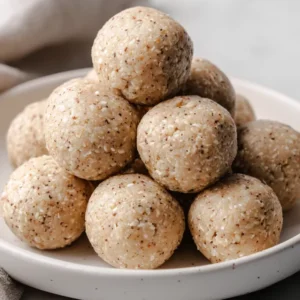
Shape the balls: Using your hands, roll the mixture into small, bite-sized balls, about 1–1.5 inches in diameter. Place them on a plate or tray lined with parchment paper to prevent sticking. This is a fun step where you can make them uniform or rustic, depending on your preference.
Step 6
Chill: Refrigerate the protein balls for at least 30 minutes to firm up. This helps them hold their shape and makes them easier to eat. Once chilled, transfer to an airtight container for storage. They can last up to a week in the fridge or a month in the freezer for longer-lasting snacks.
Step 7
Serve and enjoy: Serve these vanilla protein balls as a quick breakfast bite, post-workout snack, or healthy dessert. They pair beautifully with a glass of milk, coffee, or a smoothie for a satisfying treat any time of day.
Tips for Best No Bake Vanilla Protein Ball
- Use room temperature almond butter: This helps mix it evenly with honey and makes the dough smoother. Warm slightly if needed.
- Add milk gradually: Pour slowly to control consistency. The dough should stick together but not be too wet.
- Choose the right oats: Rolled oats work best; quick oats make the texture too soft and mushy.
- Mix-ins are optional: Chocolate chips or nuts add texture. Fold in gently so balls remain smooth.
- Chill properly: Refrigerate at least 30 minutes so balls hold shape. Freezing helps for longer storage.
- Use a cookie scoop: Makes uniform balls. Less rolling effort, perfect size for snacks.
- Store airtight: Keeps them fresh up to a week. Avoid moisture to prevent stickiness.
Optional Ingredients
- Mini chocolate chips for sweetness
- Chopped nuts for crunch
- Shredded coconut for flavor
- Dried cranberries or raisins for tartness
- Chia seeds or flaxseed for extra fiber
- Cocoa powder for a chocolate twist
How to Serve No Bake Vanilla Protein Ball?
I usually serve these protein balls as a snack for my kids during homework or playtime. They love to grab one or two from the fridge, and it keeps them happy and full until dinner without needing anything else. I sometimes pair them with a small glass of cold milk or a warm cup of cocoa, which makes the snack feel like a treat, even though it’s healthy and guilt-free.
I also serve them as a post-workout energy bite for myself. After exercise, I grab a couple of these protein balls along with some water or a smoothie. They are easy to eat, quick, and provide a balanced mix of protein, healthy fats, and carbohydrates that helps me recover and feel energized without weighing me down.
I have found they are also perfect for sharing or entertaining. I often place a few on a small plate for guests or pack them in little snack bags for kids’ lunches, road trips, or office breaks. They look appealing, especially if rolled neatly and garnished with a sprinkle of coconut, chocolate chips, or a drizzle of melted chocolate. The presentation is simple, but it makes them feel like a homemade treat everyone will love.
Is No Bake Vanilla Protein Ball Healthy?
Yes, these protein balls are healthy because they are made with natural ingredients like oats, nut butter, and honey. They are low in processed sugar, high in protein, and provide a good amount of fiber.
They are also versatile. You can control the sweetness, add extra seeds or nuts, and still enjoy a guilt-free snack that keeps you full and satisfied between meals. Compared to store-bought bars or cookies, they are far more nutritious and homemade so you know exactly what goes in.
Variations and Substitutions
- Chocolate Peanut Butter Balls: Replace vanilla protein powder with chocolate and almond butter with peanut butter. Add chocolate chips for extra indulgence.
- Coconut Vanilla Balls: Add shredded coconut into the dough and roll balls in coconut for texture and flavor.
- Berry Bliss Balls: Fold in freeze-dried berries or dried cranberries to add a tart bite and vibrant color.
- Mocha Protein Balls: Mix a teaspoon of instant coffee into the wet ingredients for a subtle coffee flavor.
- Cinnamon Spice Balls: Add 1 teaspoon of cinnamon and a pinch of nutmeg for a warm, cozy flavor.
- Chocolate Chip Mint Balls: Add chocolate chips and a drop of peppermint extract for a refreshing twist.
- Almond Joy Style Balls: Mix in shredded coconut and top with almond halves for a candy-inspired snack.
- Nut-Free Option: Use sunflower seed butter instead of almond butter for allergy-friendly balls that taste just as good.
How to Store, How to Reheat
Store these protein balls in an airtight container in the refrigerator for up to a week. If you want to make a larger batch, you can freeze them for up to a month. When frozen, separate layers with parchment paper to prevent sticking.
Reheating is usually not necessary since they are ready-to-eat. However, if you prefer a slightly softer texture, leave them at room temperature for 10–15 minutes before serving. You can also warm them in the microwave for 5–7 seconds, but avoid over-warming as the nut butter may become too soft.
Frequently Asked Questions About No Bake Vanilla Protein Ball
Can I make them without protein powder?
Yes! If you don’t have protein powder, you can simply use extra oats, powdered milk, or even a bit of ground nuts to maintain texture. The flavor will still be delicious, and they remain chewy and satisfying, though slightly less protein-packed.
How long do they last?
In the fridge, these protein balls can last about a week. Freezing extends their shelf life up to a month. Make sure to separate layers with parchment paper to avoid sticking, especially if you are storing a larger batch.
Can I use peanut butter instead of almond butter?
Absolutely! Peanut butter works just as well and gives a richer, nuttier flavor. You can also use sunflower seed butter if you want a nut-free option, making them safe for kids with allergies.
Are they suitable for kids?
Yes, they are soft, sweet, and the perfect size for little hands. Rolling them small ensures they are easy to chew. Plus, they are a healthy alternative to candy, so you can feel confident giving them to kids any time of day.
No Bake Vanilla Protein Ball
Ingredients
- 1 cup rolled oats
- 1/2 cup vanilla protein powder
- 1/4 cup almond butter or peanut butter
- 1/4 cup honey or maple syrup
- 1 teaspoon vanilla extract
- 2 –3 tablespoons milk dairy or plant-based
- 1/4 cup mini chocolate chips or chopped nuts optional
- Pinch of salt
Instructions
- Mix dry ingredients: In a large mixing bowl, combine the rolled oats, vanilla protein powder, and a pinch of salt. Stir thoroughly so that the protein powder is evenly distributed and no clumps remain. This step ensures each bite has a consistent flavor and texture.
- Combine wet ingredients: In a separate small bowl, mix the almond butter, honey, and vanilla extract until smooth. If the mixture is too thick, warm slightly in the microwave for 10–15 seconds to make it easier to stir.
- Form the dough: Pour the wet mixture into the bowl with the dry ingredients. Use a spatula or your hands to combine everything evenly. Gradually add milk, one tablespoon at a time, until the mixture comes together and can hold its shape when rolled. The dough should be slightly sticky but firm enough to form balls.
- Add mix-ins: If desired, fold in mini chocolate chips, chopped nuts, or dried fruit for extra flavor and texture. Make sure the mix-ins are evenly distributed so that each protein ball has a little surprise in every bite.
- Shape the balls: Using your hands, roll the mixture into small, bite-sized balls, about 1–1.5 inches in diameter. Place them on a plate or tray lined with parchment paper to prevent sticking. This is a fun step where you can make them uniform or rustic, depending on your preference.
- Chill: Refrigerate the protein balls for at least 30 minutes to firm up. This helps them hold their shape and makes them easier to eat. Once chilled, transfer to an airtight container for storage. They can last up to a week in the fridge or a month in the freezer for longer-lasting snacks.
- Serve and enjoy: Serve these vanilla protein balls as a quick breakfast bite, post-workout snack, or healthy dessert. They pair beautifully with a glass of milk, coffee, or a smoothie for a satisfying treat any time of day.
Leave a Reply