These Gluten Free Gooey Butter Cookies are soft, sweet, and melt-in-your-mouth treats that bring the same rich flavor of the classic gooey butter cake, but in cookie form. The best part is that they are completely gluten-free, so you can share them with everyone without worry. They have that pillowy, chewy center with a powdered sugar coating that cracks beautifully when baked, giving them a festive look and irresistible taste.
I like baking these cookies because they come together quickly, but what I love most in this recipe is how easy it is to adapt—it works perfectly whether you are making them for a holiday party, a family gathering, or just a cozy afternoon at home.
I have tried several cookie recipes, but this one is my go-to when I want something that feels homemade yet requires minimal effort. I use a gluten-free cake mix because it keeps the process simple and ensures the cookies stay soft and moist. Always, I make sure to chill the dough before baking—it’s the secret to keeping that gooey center.
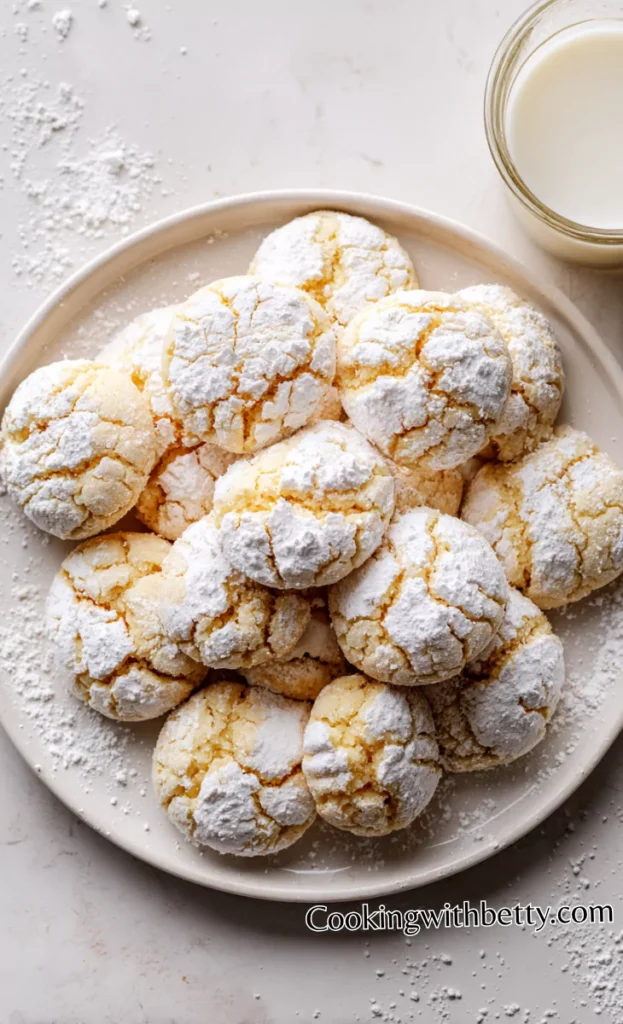
You can serve these cookies with a hot cup of coffee, some warm milk, also with a scoop of vanilla ice cream if you want to turn them into a more indulgent dessert.
Its Perfect For:
- Holiday cookie exchanges when you want something unique but simple.
- Weekend baking with kids because the steps are easy and fun.
- Afternoon tea or coffee breaks where a sweet bite is needed.
- Bringing to potlucks and gatherings to impress without stress.
- Gifting friends and neighbors in pretty tins during the holidays.
Ingredients for Gluten Free Gooey Butter Cookies
- 1 (8 oz) package cream cheese, softened
- 1/2 cup (1 stick) unsalted butter, softened
- 1 large egg
- 1 teaspoon vanilla extract
- 1 (15 oz) box gluten-free yellow cake mix
- 1/2 cup powdered sugar (plus extra for rolling)
Kitchen Equipment You’ll Need
- Large mixing bowl
- Hand mixer or stand mixer
- Rubber spatula
- Plastic wrap for chilling
- Baking sheets
- Parchment paper
- Wire cooling rack
How to make Gluten Free Gooey Butter Cookies
Step 1
Prepare the dough base: In a large mixing bowl, beat the softened cream cheese and butter together using a hand mixer or stand mixer until smooth and creamy. This should take about 2–3 minutes.
Step 2
Add wet ingredients: Mix in the egg and vanilla extract, continuing to beat until fully combined and the mixture looks fluffy. Scrape down the sides of the bowl as needed to ensure even mixing.
Step 3
Incorporate cake mix: Gradually add the gluten-free yellow cake mix to the bowl. Start mixing on low speed to avoid flour clouds, then increase speed until everything is combined. The dough will be thick and sticky.
Step 4
Chill the dough: Cover the bowl with plastic wrap and place it in the refrigerator for at least 30 minutes. This step is important—it makes the dough easier to handle and prevents the cookies from spreading too much while baking.
Step 5
Preheat the oven: While the dough chills, preheat your oven to 350°F (175°C). Line two baking sheets with parchment paper to prevent sticking.
Step 6
Shape the cookies: Once chilled, scoop tablespoon-sized portions of dough and roll them into balls using lightly floured or powdered sugar-coated hands. Roll each dough ball generously in powdered sugar until fully coated. This coating will give the cookies their signature crinkly, powdered look.
Step 7
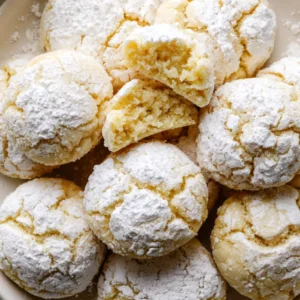
Bake: Place the dough balls about 2 inches apart on the prepared baking sheets. Bake for 11–13 minutes, until the cookies are set at the edges but still slightly soft in the center. Do not overbake—this is what keeps them gooey!
Step 8
Cool and serve: Remove from the oven and allow the cookies to rest on the baking sheet for 2–3 minutes before transferring them to a wire rack. Dust lightly with extra powdered sugar if desired. Serve warm for maximum gooeyness or store in an airtight container once cooled.
Tips for Making the Best Gluten Free Gooey Butter Cookies
- Soften ingredients properly. Always let your butter and cream cheese reach room temperature before mixing. This makes the batter smoother and easier to work with.
- Chill the dough. Don’t skip chilling, even if you’re in a rush. A chilled dough is less sticky, easier to roll, and holds shape better while baking.
- Use powdered sugar generously. Coat the dough balls heavily before baking. This not only adds sweetness but creates that pretty crackle effect on the cookies.
- Avoid overbaking. The edges should look set but the centers slightly soft when you pull them from the oven. They continue cooking as they cool.
- Space cookies apart. Place dough balls at least 2 inches apart. These cookies spread a little, and proper spacing ensures they don’t merge.
- Try different gluten-free cake mixes. Not all brands are the same. Some produce lighter cookies, while others make denser ones. Experiment until you find your favorite.
- Dust before serving. A light sprinkle of powdered sugar on the cooled cookies makes them extra beautiful, especially when serving for guests.
Optional Ingredients
- A pinch of cinnamon for warm spice.
- Lemon zest for a refreshing twist.
- White chocolate chips for added sweetness.
- Chopped pecans or walnuts for crunch.
- Almond extract instead of vanilla for depth.
- Shredded coconut to change the texture.
How to Serve Gluten Free Gooey Butter Cookies
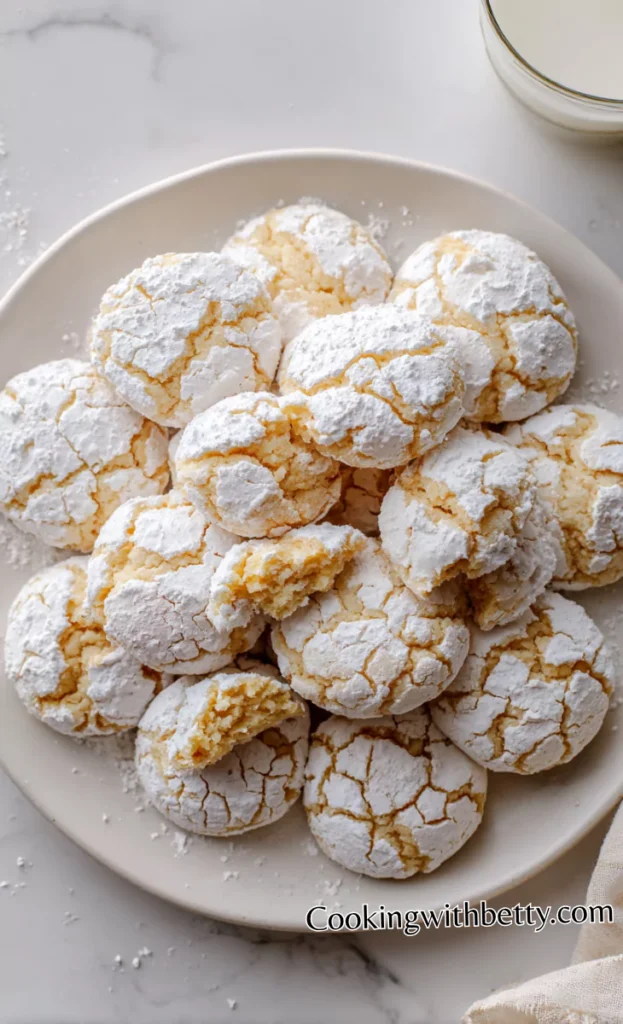
I love serving these cookies fresh out of the oven when they are still warm and slightly gooey in the center. They pair wonderfully with a cup of tea or coffee, making them a comforting treat after a long day. Guests often comment on how beautiful the crinkled powdered sugar coating looks on a serving plate.
I also enjoy serving them at gatherings on a tiered dessert tray alongside brownies, fudge, and fruit tarts. These cookies bring balance because they are light yet rich, and their festive look adds charm to any dessert spread. If you sprinkle them with a bit of extra powdered sugar just before setting them out, they always look bakery-perfect.
I sometimes serve them as part of a more decadent dessert by sandwiching ice cream between two cookies. This turns them into a gooey cookie ice cream sandwich that kids and adults both adore. If you like variety, drizzle a little melted white or dark chocolate over the top for a gourmet touch.
Is Gluten Free Gooey Butter Cookies Healthy?
Gluten free gooey butter cookies are definitely a sweet indulgence, not a health food. They contain butter, cream cheese, and sugar, which makes them rich and satisfying but also high in calories and fat. They are best enjoyed in moderation as a treat rather than a daily snack.
However, since they use gluten-free cake mix, they are safe for people who cannot eat gluten due to celiac disease or gluten sensitivity. This makes them an inclusive option when sharing desserts, ensuring everyone can enjoy them without discomfort.
Variations and Substitutions
- Chocolate Gooey Cookies: Use gluten-free chocolate cake mix instead of yellow cake mix for a rich chocolate flavor. Roll them in cocoa powder mixed with powdered sugar for a darker look.
- Pumpkin Spice Version: Add pumpkin spice and use gluten-free spice cake mix. Perfect for fall gatherings, especially around Thanksgiving.
- Red Velvet Gooey Cookies: Swap in red velvet cake mix and roll in powdered sugar for festive red-and-white cookies. Lovely for Valentine’s or Christmas.
- Funfetti Twist: Use gluten-free funfetti cake mix and add colorful sprinkles inside the dough. These are great for birthday parties and kids’ events.
- Peanut Butter Variation: Mix a couple tablespoons of peanut butter into the dough for a nutty flavor. Works best with chocolate drizzle on top.
- Lemon Gooey Cookies: Add lemon zest and use lemon cake mix. They come out bright, fresh, and tangy, ideal for spring or summer gatherings.
- Mint Chocolate Cookies: Use chocolate cake mix, add a drop of peppermint extract, and drizzle with white chocolate for a holiday treat.
- Nutella Swirl: Add a small spoonful of Nutella into the center of each dough ball before baking. The gooey chocolate center is a delicious surprise.
How to Store, How to Reheat
To store these cookies, allow them to cool completely and then place them in an airtight container. They stay fresh at room temperature for up to 3 days or in the refrigerator for up to 5 days. If stacking, add parchment paper between layers to prevent sticking.
To reheat, place a cookie in the microwave for about 10–12 seconds. This softens the center and brings back that gooey texture. If reheating several, you can warm them on a baking sheet in a 300°F oven for 5 minutes. This helps them taste almost as good as freshly baked.
Frequently Asked Questions about Gluten Free Gooey Butter Cookies
1. Can I freeze gluten free gooey butter cookies?
Yes, you can freeze them after baking. Place cooled cookies in a freezer-safe bag for up to 2 months, and thaw at room temperature before serving.
2. Can I make the dough ahead of time?
Absolutely. You can prepare the dough, cover it, and refrigerate for up to 24 hours before baking. This makes it convenient for busy schedules.
3. What cake mix brands work best?
I find that Betty Crocker and King Arthur gluten-free mixes give the best results. They keep the cookies soft and prevent a gritty texture.
4. Why do my cookies spread too much?
This usually happens if the dough isn’t chilled enough. Make sure to refrigerate the dough for at least 30 minutes before shaping.
5. Can I make them dairy-free too?
Yes, by using dairy-free cream cheese and plant-based butter alternatives. The texture will be slightly different but still delicious.
6. Do I need to use powdered sugar on top?
It’s optional, but highly recommended. The sugar coating gives the cookies their signature cracked look and adds sweetness.
Gluten Free Gooey Butter Cookies
Ingredients
- 1 8 oz package cream cheese, softened
- 1/2 cup 1 stick unsalted butter, softened
- 1 large egg
- 1 teaspoon vanilla extract
- 1 15 oz box gluten-free yellow cake mix
- 1/2 cup powdered sugar plus extra for rolling
Instructions
- Prepare the dough base: In a large mixing bowl, beat the softened cream cheese and butter together using a hand mixer or stand mixer until smooth and creamy. This should take about 2–3 minutes.
- Add wet ingredients: Mix in the egg and vanilla extract, continuing to beat until fully combined and the mixture looks fluffy. Scrape down the sides of the bowl as needed to ensure even mixing.
- Incorporate cake mix: Gradually add the gluten-free yellow cake mix to the bowl. Start mixing on low speed to avoid flour clouds, then increase speed until everything is combined. The dough will be thick and sticky.
- Chill the dough: Cover the bowl with plastic wrap and place it in the refrigerator for at least 30 minutes. This step is important—it makes the dough easier to handle and prevents the cookies from spreading too much while baking.
- Preheat the oven: While the dough chills, preheat your oven to 350°F (175°C). Line two baking sheets with parchment paper to prevent sticking.
- Shape the cookies: Once chilled, scoop tablespoon-sized portions of dough and roll them into balls using lightly floured or powdered sugar-coated hands. Roll each dough ball generously in powdered sugar until fully coated. This coating will give the cookies their signature crinkly, powdered look.
- Bake: Place the dough balls about 2 inches apart on the prepared baking sheets. Bake for 11–13 minutes, until the cookies are set at the edges but still slightly soft in the center. Do not overbake—this is what keeps them gooey!
- Cool and serve: Remove from the oven and allow the cookies to rest on the baking sheet for 2–3 minutes before transferring them to a wire rack. Dust lightly with extra powdered sugar if desired. Serve warm for maximum gooeyness or store in an airtight container once cooled.
Leave a Reply