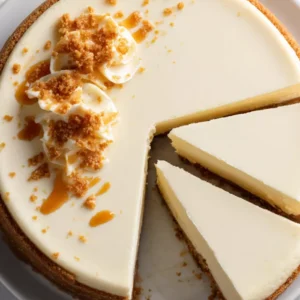
Making this cheesecake feels nostalgic — like those classic desserts you used to watch your mom prepare, but with a modern twist. The Keebler Cheesecake is a creamy, no-bake dessert that combines the smoothness of cream cheese with the sweet, toasty flavor of a Keebler crust. It’s simple, rich, and so satisfying. The beauty of this recipe is how easy it is to make yet how luxurious it tastes. You don’t need fancy skills or special tools. Just a few good ingredients, a mixing bowl, and a bit of patience while it chills — and you’ll have a dessert that’s creamy, light, and full of flavor.
I have made this Keebler Cheesecake many times, and it never fails to impress my friends. I use Keebler graham cracker crumbs or their ready-made crust when I’m short on time. Always make sure your cream cheese is softened — that’s the secret to getting a smooth, lump-free filling.

You can serve this cheesecake plain for a classic touch, topped with fresh berries for something fruity, or drizzled with caramel or chocolate sauce when you’re feeling indulgent. It’s also lovely with a few crushed Keebler cookies sprinkled on top for texture.
It’s Perfect For:
- Family gatherings or potlucks
- Birthday and holiday desserts
- A quick make-ahead treat
- Picnics and celebrations
- Anytime you want a no-fuss dessert that looks impressive
Ingredients
For the Crust:
- 1 ½ cups Keebler graham cracker crumbs (or Keebler Ready Crust if using pre-made)
- ¼ cup granulated sugar
- 6 tablespoons unsalted butter, melted
For the Cheesecake Filling:
- 16 oz cream cheese, softened
- ¾ cup granulated sugar
- 1 teaspoon vanilla extract
- 1 tablespoon lemon juice (optional, for a slight tang)
- 1 cup heavy whipping cream, cold
Optional Toppings:
- Whipped cream
- Fresh berries or cherry pie filling
- Crushed Keebler cookies for garnish
Kitchen Equipment You’ll Need
- Mixing bowls (one large, one medium)
- Electric hand mixer or stand mixer
- Rubber spatula
- Measuring cups and spoons
- 9-inch springform pan or pie dish
- Plastic wrap or aluminum foil
- Serving knife and dessert plates

How to Make Keebler Cheesecake
Step 1
Prepare the crust: If you’re making your crust from scratch, preheat your oven to 350°F (175°C). In a medium mixing bowl, combine Keebler graham cracker crumbs and sugar. Pour in the melted butter and stir with a fork until the mixture looks like damp sand. Press the crumb mixture firmly into the bottom (and slightly up the sides) of a 9-inch springform pan or pie dish. You can either chill the crust for a no-bake version or bake it for 8–10 minutes until lightly golden. Set aside to cool completely before adding the filling.
Step 2
Whip the cream: In a clean mixing bowl, whip the cold heavy cream using an electric mixer on high speed until stiff peaks form. This gives your cheesecake a light and airy texture. Keep it in the fridge while you prepare the cream cheese mixture.
Step 3
Make the cheesecake filling: In another large bowl, beat the softened cream cheese until smooth and creamy. Gradually add the sugar, mixing until well incorporated and no lumps remain. Add vanilla extract and lemon juice (if using) and continue to beat until fluffy and uniform. The mixture should look silky and rich.
Step 4
Combine and fold: Gently fold the whipped cream into the cream cheese mixture using a spatula. Do this slowly to maintain the lightness of the filling. Keep folding until no white streaks remain — the batter should be smooth, thick, and slightly airy.
Step 5
Assemble the cheesecake: Pour the filling into the prepared crust. Use a spatula to spread the top evenly and smooth out any bubbles or uneven spots. If you’re using a Keebler Ready Crust, you can pour it directly into the pre-made shell — it’s quick and perfectly shaped!
Step 6
Chill and set: Cover the cheesecake with plastic wrap or foil and refrigerate for at least 4 hours, or preferably overnight. This step allows the cheesecake to firm up and the flavors to meld beautifully.
Step 7
Serve and enjoy: Before serving, top your cheesecake with a generous swirl of whipped cream, fresh berries, or your favorite fruit topping. For an extra crunch, sprinkle crushed Keebler cookies over the top. Slice cleanly using a knife dipped in warm water and wiped dry between cuts. Serve chilled and enjoy every creamy, cookie-crusted bite!
Tips for the Perfect Keebler Cheesecake
- Soften your cream cheese properly.
Let it sit at room temperature for at least 30 minutes before mixing. This helps avoid lumps and gives you a silky-smooth texture. - Don’t overmix the batter.
Once the ingredients come together, stop beating. Overmixing can make the filling too airy, and it might not set firmly. - Chill it long enough.
Four hours is the minimum, but overnight chilling gives the best structure and flavor. The longer it sets, the creamier it becomes. - Use cold whipped cream.
If you’re whipping your own, start with chilled heavy cream. It makes folding easier and keeps the filling light. - Sweeten to taste.
Some prefer their cheesecake less sweet. Taste the filling before chilling — you can always add more sugar or honey if needed. - Try layering toppings.
A thin fruit layer, then a swirl of whipped cream, adds both beauty and flavor contrast. Think cherries, strawberries, or lemon curd. - Slice with care.
Use a knife dipped in warm water for clean slices. Wipe it after every cut — your cheesecake will look bakery-perfect.
Optional Ingredients
- Lemon zest – adds brightness and balances sweetness.
- Vanilla bean paste – for a deeper, aromatic vanilla flavor.
- White chocolate chips – melt into the batter for richness.
- Almond extract – a drop gives a nutty aroma.
- Crushed Keebler cookies – fold them into the filling for crunch.
- Fresh fruit – add strawberries, blueberries, or raspberries for a refreshing touch.
How to Serve Keebler Cheesecake
I always let my Keebler Cheesecake rest at room temperature for about 10–15 minutes before serving. This softens the texture slightly and makes each bite melt in your mouth. The crust stays crisp, and the filling gets creamy without falling apart.
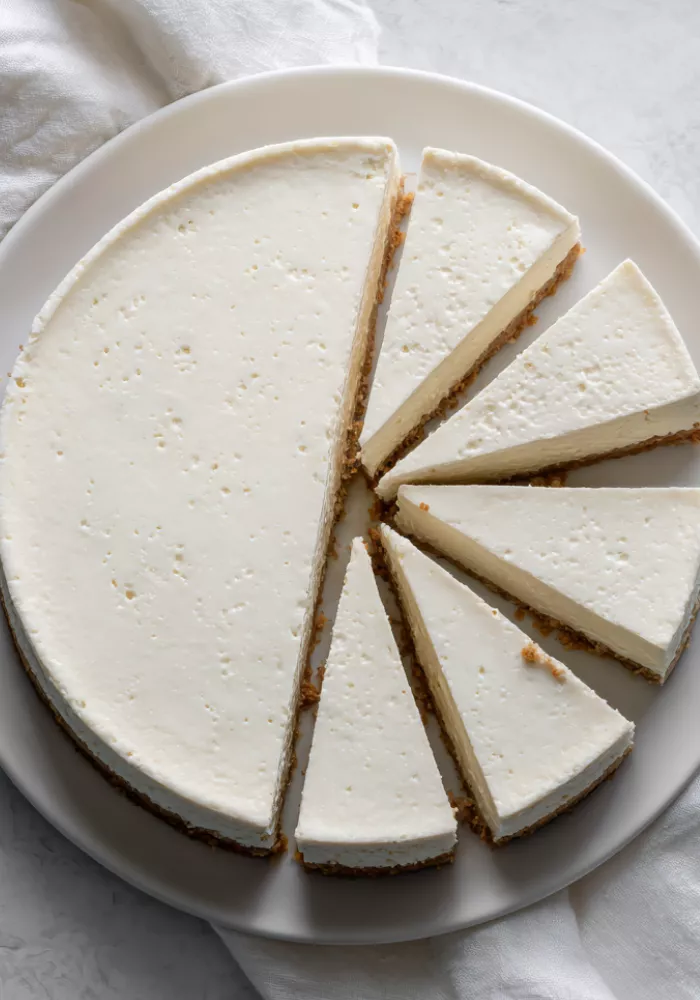
I like to slice it with a thin, sharp knife and serve it on simple white plates — the pale yellow of the cheesecake against the golden crust looks elegant on its own. Sometimes I drizzle a little caramel or chocolate sauce around the edges for that restaurant-style finish.
I also love topping it with whipped cream and a few fresh berries when I’m serving guests. The color contrast makes it beautiful, and the sweet-tart flavor pairs perfectly with the rich, creamy filling. It’s a dessert that looks fancy but feels like home.
Is Keebler Cheesecake Healthy?
While Keebler Cheesecake isn’t exactly a health food, it can be enjoyed in moderation as part of a balanced lifestyle. The ingredients — cream cheese, butter, and sugar — make it rich, but each bite is so satisfying that a small slice is enough.
If you’d like a lighter version, you can use low-fat cream cheese, reduce the sugar slightly, or use Greek yogurt for part of the filling. It will still taste creamy and delicious without feeling heavy.
Variations and Substitutions
- Chocolate Keebler Cheesecake
Mix melted dark chocolate into the filling and use a Keebler chocolate crust. It’s rich, decadent, and perfect for chocolate lovers. - Strawberry Swirl Cheesecake
Add strawberry puree and gently swirl it into the filling before chilling. The pink marbling looks beautiful and tastes fresh. - Peanut Butter Cheesecake
Blend a few tablespoons of creamy peanut butter into the batter and top with chocolate shavings for a sweet-salty twist. - Lemon Cheesecake
Add lemon zest and juice for a tangy, refreshing taste — ideal for summer gatherings or after a heavy meal. - Oreo Keebler Cheesecake
Fold crushed Oreo cookies into the filling and top with whipped cream. Kids love this playful version! - Caramel Pecan Cheesecake
Drizzle caramel sauce and sprinkle chopped pecans on top for a southern-inspired treat. - Mini Cheesecakes
Use muffin liners or small tart pans to make bite-sized versions — great for parties or gifting. - Pumpkin Cheesecake
Blend in pumpkin puree and warm spices like cinnamon and nutmeg for a cozy fall dessert.
How to Store and Reheat Keebler Cheesecake
Store leftover cheesecake covered tightly with plastic wrap or in an airtight container in the refrigerator for up to five days. It’s best to keep it on a flat surface to avoid dents or cracks on top. The crust stays crisp, and the flavor actually deepens after a day or two.
If you want to keep it longer, slice it into portions and freeze for up to two months. Wrap each slice in plastic and place in a freezer-safe bag. Thaw in the fridge overnight before serving — it will taste as creamy as the day you made it.
Although cheesecakes are usually served cold, some people like a slightly warm slice. If that’s you, warm a slice in the microwave for about 10–15 seconds. Just enough to take the chill off — don’t overheat or it will melt.
You can also let it sit at room temperature for 20–30 minutes before serving. This keeps the filling soft and creamy while preserving the crust’s texture.
Frequently Asked Questions about Keebler Cheesecake
Can I use Keebler Ready Crust instead of homemade?
Yes! The Keebler Ready Crust is a great shortcut and saves time when you’re in a hurry. It has the same buttery, sweet flavor and perfectly holds the cheesecake filling. You can even find it in chocolate or shortbread varieties if you want something different.
How do I make the filling lighter?
To lighten it up, use low-fat or Neufchâtel cream cheese instead of full-fat. You can also fold in a bit of Greek yogurt to reduce calories while keeping a creamy consistency. It won’t affect the flavor much, but it will feel less heavy after a meal.
Can I make this recipe without a mixer?
Yes, though it requires a bit of muscle! Use a whisk or spatula and mix by hand until the batter is smooth and lump-free. Make sure your cream cheese is softened before you start — it’s the key to blending everything easily without an electric mixer.How long should it chill before serving?
Chilling for at least 4 hours allows the cheesecake to set properly, but overnight is even better. The longer it chills, the more firm and flavorful it becomes. If you’re making it ahead for a party, you can prepare it the night before and it will be perfect by morning.
Keebler Cheesecake
Ingredients
For the Crust:
- 1 ½ cups Keebler graham cracker crumbs or Keebler Ready Crust if using pre-made
- ¼ cup granulated sugar
- 6 tablespoons unsalted butter melted
For the Cheesecake Filling:
- 16 oz cream cheese softened
- ¾ cup granulated sugar
- 1 teaspoon vanilla extract
- 1 tablespoon lemon juice optional, for a slight tang
- 1 cup heavy whipping cream cold
Optional Toppings:
- Whipped cream
- Fresh berries or cherry pie filling
- Crushed Keebler cookies for garnish
Instructions
- Prepare the crust: If you’re making your crust from scratch, preheat your oven to 350°F (175°C). In a medium mixing bowl, combine Keebler graham cracker crumbs and sugar. Pour in the melted butter and stir with a fork until the mixture looks like damp sand. Press the crumb mixture firmly into the bottom (and slightly up the sides) of a 9-inch springform pan or pie dish. You can either chill the crust for a no-bake version or bake it for 8–10 minutes until lightly golden. Set aside to cool completely before adding the filling.
- Whip the cream: In a clean mixing bowl, whip the cold heavy cream using an electric mixer on high speed until stiff peaks form. This gives your cheesecake a light and airy texture. Keep it in the fridge while you prepare the cream cheese mixture.
- Make the cheesecake filling: In another large bowl, beat the softened cream cheese until smooth and creamy. Gradually add the sugar, mixing until well incorporated and no lumps remain. Add vanilla extract and lemon juice (if using) and continue to beat until fluffy and uniform. The mixture should look silky and rich.
- Combine and fold: Gently fold the whipped cream into the cream cheese mixture using a spatula. Do this slowly to maintain the lightness of the filling. Keep folding until no white streaks remain — the batter should be smooth, thick, and slightly airy.
- Assemble the cheesecake: Pour the filling into the prepared crust. Use a spatula to spread the top evenly and smooth out any bubbles or uneven spots. If you’re using a Keebler Ready Crust, you can pour it directly into the pre-made shell — it’s quick and perfectly shaped!
- Chill and set: Cover the cheesecake with plastic wrap or foil and refrigerate for at least 4 hours, or preferably overnight. This step allows the cheesecake to firm up and the flavors to meld beautifully.
- Serve and enjoy: Before serving, top your cheesecake with a generous swirl of whipped cream, fresh berries, or your favorite fruit topping. For an extra crunch, sprinkle crushed Keebler cookies over the top. Slice cleanly using a knife dipped in warm water and wiped dry between cuts. Serve chilled and enjoy every creamy, cookie-crusted bite!
Leave a Reply