My mother likes baking simple butter cookies, but what she really enjoys in red velvet chocolate cookies is the mix of flavor and color that stands out. She says they bring joy to the table because they look different from ordinary cookies and still keep the comfort of chocolate inside. Watching her smile while tasting one warm from the oven is something I always treasure.
I have baked these cookies many times for friends, holidays, and even just on quiet afternoons. I use good quality cocoa powder, fresh butter, and gel food coloring for that strong red shade. Always, I try to chill the dough a little before baking—it makes the cookies soft inside but keeps the edges neat and chewy.
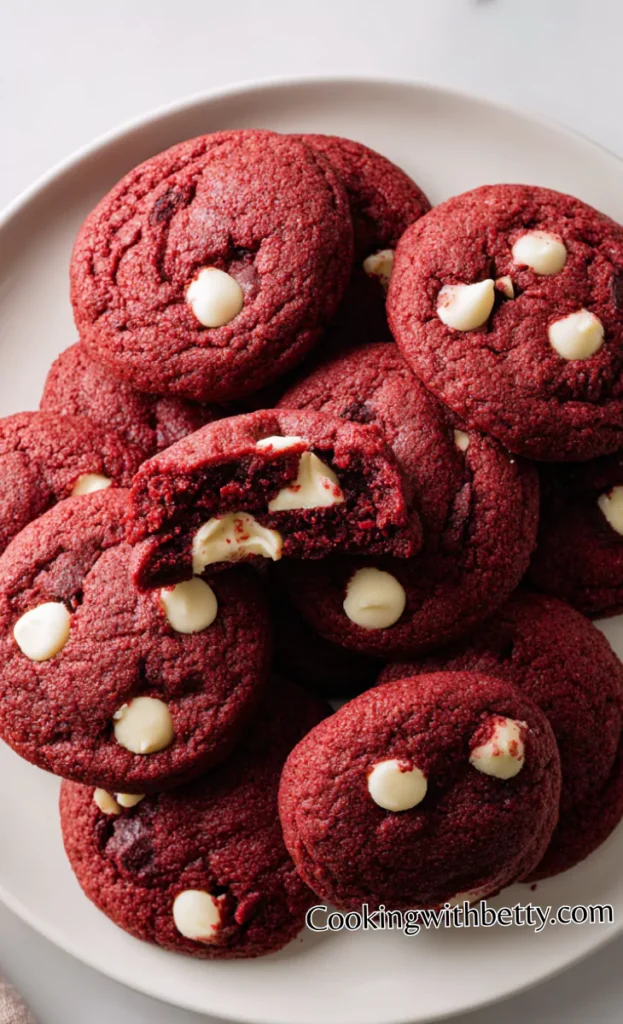
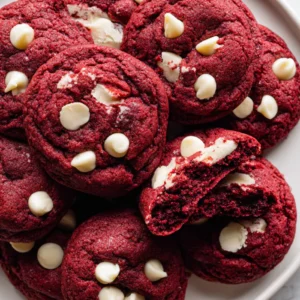
I love serving these cookies warm straight from the oven because the chocolate chips are still melty and soft. The red color makes them look beautiful on a plate, and they become the highlight of any snack table. When placed on a simple white platter, they look elegant and eye-catching.
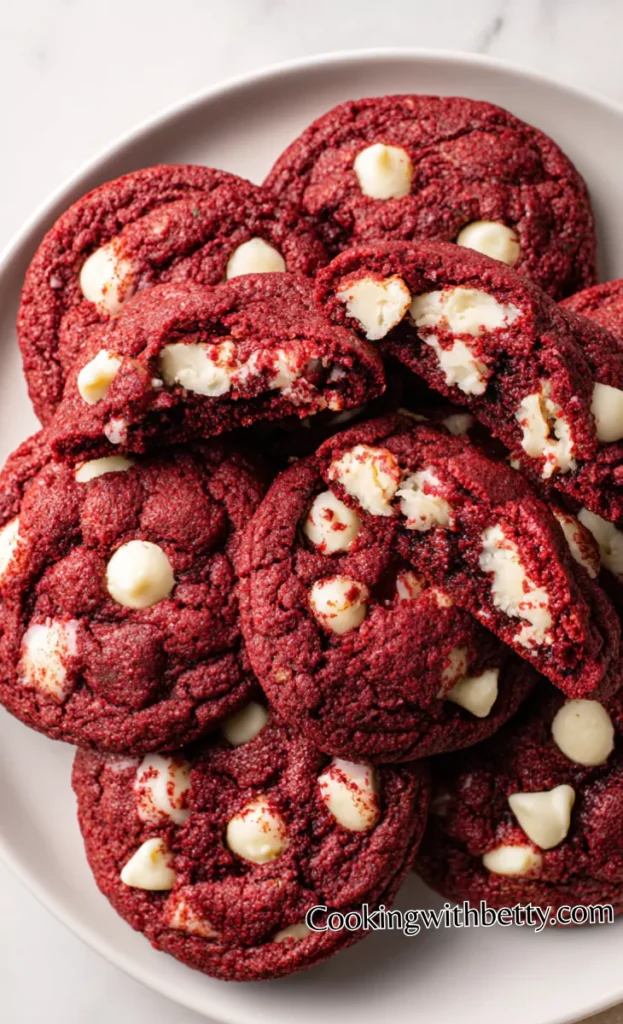
I also serve them during special family occasions, like birthdays, anniversaries, and Christmas gatherings. They add charm to the dessert table and match well with other treats. Guests always find them unique compared to ordinary cookies, and it becomes a talking point at the party.
It’s Perfect For:
- Afternoon tea gatherings
- Holiday celebrations like Christmas or Valentine’s Day
- School lunch treats for kids
- Potluck desserts to impress guests
- Late-night cravings with a warm drink
Ingredients
- 1 1/2 cups all-purpose flour
- 1/4 cup unsweetened cocoa powder
- 1 teaspoon baking soda
- 1/4 teaspoon salt
- 1/2 cup unsalted butter, softened
- 3/4 cup granulated sugar
- 1/4 cup brown sugar, packed
- 1 large egg
- 2 teaspoons vanilla extract
- 1 tablespoon red food coloring (gel recommended for vibrant color)
- 1/2 cup buttermilk
- 1 cup semi-sweet chocolate chips (plus more for topping)
Kitchen Equipment You’ll Need
- Mixing bowls (one large, one medium)
- Measuring cups and spoons
- Electric hand mixer or stand mixer
- Rubber spatula
- Baking sheets lined with parchment paper
- Wire cooling rack
How to Make Red Velvet Chocolate Cookies
Step 1
Prepare the dry ingredients: In a medium bowl, whisk together the flour, cocoa powder, baking soda, and salt. Set aside.
Step 2
Cream the butter and sugars: In a large mixing bowl, use a hand mixer or stand mixer to beat the softened butter, granulated sugar, and brown sugar until light and fluffy, about 2–3 minutes.
Step 3
Add wet ingredients: Beat in the egg, vanilla extract, and red food coloring. Mix until smooth and evenly colored.
Step 4
Combine the batter: Add the dry ingredients to the wet mixture in two parts, alternating with the buttermilk. Mix gently after each addition until just combined—don’t overmix, or the cookies may become dense. Fold in the chocolate chips.
Step 5
Chill the dough: Cover the bowl with plastic wrap and refrigerate for 30 minutes. This helps the dough firm up and prevents the cookies from spreading too much while baking.
Step 6
Bake the cookies: Preheat the oven to 350°F (175°C). Line two baking sheets with parchment paper. Scoop out rounded tablespoons of dough, roll into balls, and place them 2 inches apart on the sheet. Press a few extra chocolate chips on top of each dough ball for a bakery-style look. Bake for 11–12 minutes, until the edges are set but the centers are still soft.
Step 7
Cool and serve: Allow cookies to cool on the baking sheet for 5 minutes before transferring to a wire rack to cool completely. Serve warm for melty chocolate bites or at room temperature for a chewy texture.
Tips for Perfect Red Velvet Chocolate Cookies
- Use gel food coloring – Liquid coloring can water down your dough. Gel is stronger and gives a rich, even red color without changing the texture.
- Don’t skip chilling the dough – Chilling helps prevent the cookies from spreading too thin and gives them a soft and chewy bite.
- Measure flour correctly – Scoop flour into a spoon and level it off. Too much flour can make the cookies dry and heavy.
- Cream butter and sugar well – Beat until fluffy, at least 2–3 minutes. This adds air to the dough, making the cookies lighter in texture.
- Mix in dry ingredients slowly – Stir just until combined. Overmixing will lead to tough cookies instead of soft ones.
- Add extra chocolate chips on top – Press a few on the dough balls before baking. It makes them look more appealing.
- Cool before storing – Always let cookies cool completely on a wire rack before putting them in a container, or they can get soggy.
Optional Ingredients
- White chocolate chips for contrast
- Chopped pecans or walnuts
- A hint of espresso powder for deeper flavor
- Cream cheese chunks for a cheesecake-like taste
- Sprinkles for a festive look
- A touch of cinnamon for warmth
How to Serve Red Velvet Chocolate Cookies
I enjoy serving these cookies with a cold glass of milk or a hot cup of coffee, especially on cozy afternoons. The mix of rich chocolate and soft texture makes them satisfying even with a simple drink. They are also beautiful when served on a tray with doilies for that homey, vintage feel.
I often make them for gatherings because they bring color to the dessert table. Alongside other treats like brownies, fruit tarts, or cupcakes, they really stand out and draw attention. When people bite into them, they love the mix of flavors—slightly chocolatey, tangy, and sweet.
I also like to serve them as part of a dessert plate with a scoop of vanilla ice cream and maybe a drizzle of chocolate syrup. This transforms them from a simple cookie into a full dessert. You can even crumble them on top of ice cream or yogurt for a quick, creative twist.
Is Red Velvet Chocolate Cookies Healthy?
Red velvet chocolate cookies are not the healthiest choice since they contain sugar, butter, and chocolate. However, they can be enjoyed in moderation as part of a balanced diet.
You can make them slightly healthier by using less sugar, substituting whole wheat flour for part of the all-purpose flour, or adding nuts for extra nutrients. They are still a dessert, but one that brings happiness in every bite.
Variations and Substitutions
- Cream Cheese Stuffed Cookies – Fill the dough with a little cream cheese mixture before baking. They taste like mini cheesecakes.
- Vegan Red Velvet Cookies – Use vegan butter, flaxseed egg, and dairy-free chocolate chips for a plant-based option.
- Gluten-Free Version – Replace the flour with a gluten-free blend. They bake soft and chewy without losing flavor.
- Double Chocolate Red Velvet – Add cocoa powder and both milk and dark chocolate chips for an extra-rich treat.
- Red Velvet Crinkle Cookies – Roll dough balls in powdered sugar before baking for a crinkled look.
- Nutty Red Velvet Cookies – Mix in almonds, pecans, or walnuts for crunch and flavor.
- Red Velvet Sandwich Cookies – Bake them thinner and sandwich cream cheese frosting between two cookies.
- Low-Sugar Version – Use a sugar substitute like stevia or monk fruit to cut down on sweetness without losing taste.
How to Store and Reheat
To store, place cooled cookies in an airtight container at room temperature for up to 5 days. If you want them to last longer, keep them in the refrigerator for up to 10 days. For even longer storage, freeze them in a sealed bag for up to 3 months.
To reheat, simply place a cookie in the microwave for 10–12 seconds until warm and slightly soft. If reheating frozen cookies, let them thaw at room temperature first, then warm them up for the same time. They taste almost as fresh as when baked.
Frequently Asked Questions about Red Velvet Chocolate Cookies
Why is my red velvet cookie dough sticky?
The food coloring and buttermilk can make the dough sticky. Chill it for 30 minutes before baking to make it easier to handle.
Can I use liquid food coloring instead of gel?
Yes, but you will need more of it, and it might water down the dough a little. Gel coloring gives a brighter, deeper red and works best.
How do I keep cookies chewy?
Do not overbake them. Remove the cookies when the edges are set but the centers still look slightly soft. They will finish cooking on the tray while cooling.
Can I freeze the dough or baked cookies?
Yes. For dough, shape it into balls, freeze on a tray, then transfer to a bag. For baked cookies, freeze them in a container. Both last up to 3 months.
Red Velvet Chocolate Cookies
Ingredients
- 1 1/2 cups all-purpose flour
- 1/4 cup unsweetened cocoa powder
- 1 teaspoon baking soda
- 1/4 teaspoon salt
- 1/2 cup unsalted butter softened
- 3/4 cup granulated sugar
- 1/4 cup brown sugar packed
- 1 large egg
- 2 teaspoons vanilla extract
- 1 tablespoon red food coloring gel recommended for vibrant color
- 1/2 cup buttermilk
- 1 cup semi-sweet chocolate chips plus more for topping
Instructions
- Prepare the dry ingredients: In a medium bowl, whisk together the flour, cocoa powder, baking soda, and salt. Set aside.
- Cream the butter and sugars: In a large mixing bowl, use a hand mixer or stand mixer to beat the softened butter, granulated sugar, and brown sugar until light and fluffy, about 2–3 minutes.
- Add wet ingredients: Beat in the egg, vanilla extract, and red food coloring. Mix until smooth and evenly colored.
- Combine the batter: Add the dry ingredients to the wet mixture in two parts, alternating with the buttermilk. Mix gently after each addition until just combined—don’t overmix, or the cookies may become dense. Fold in the chocolate chips.
- Chill the dough: Cover the bowl with plastic wrap and refrigerate for 30 minutes. This helps the dough firm up and prevents the cookies from spreading too much while baking.
- Bake the cookies: Preheat the oven to 350°F (175°C). Line two baking sheets with parchment paper. Scoop out rounded tablespoons of dough, roll into balls, and place them 2 inches apart on the sheet. Press a few extra chocolate chips on top of each dough ball for a bakery-style look. Bake for 11–12 minutes, until the edges are set but the centers are still soft.
- Cool and serve: Allow cookies to cool on the baking sheet for 5 minutes before transferring to a wire rack to cool completely. Serve warm for melty chocolate bites or at room temperature for a chewy texture.
Leave a Reply