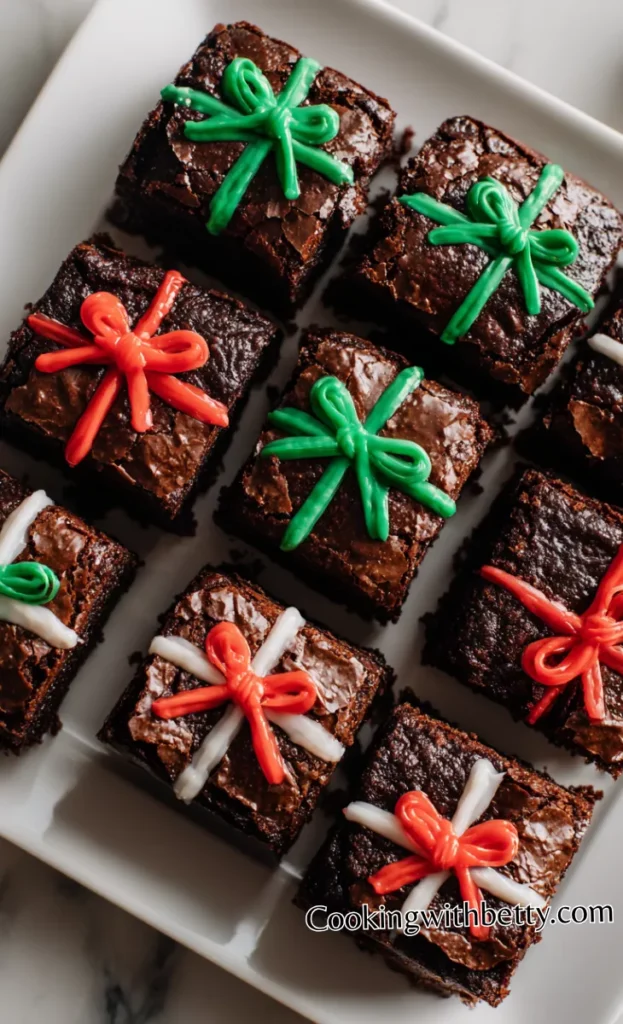
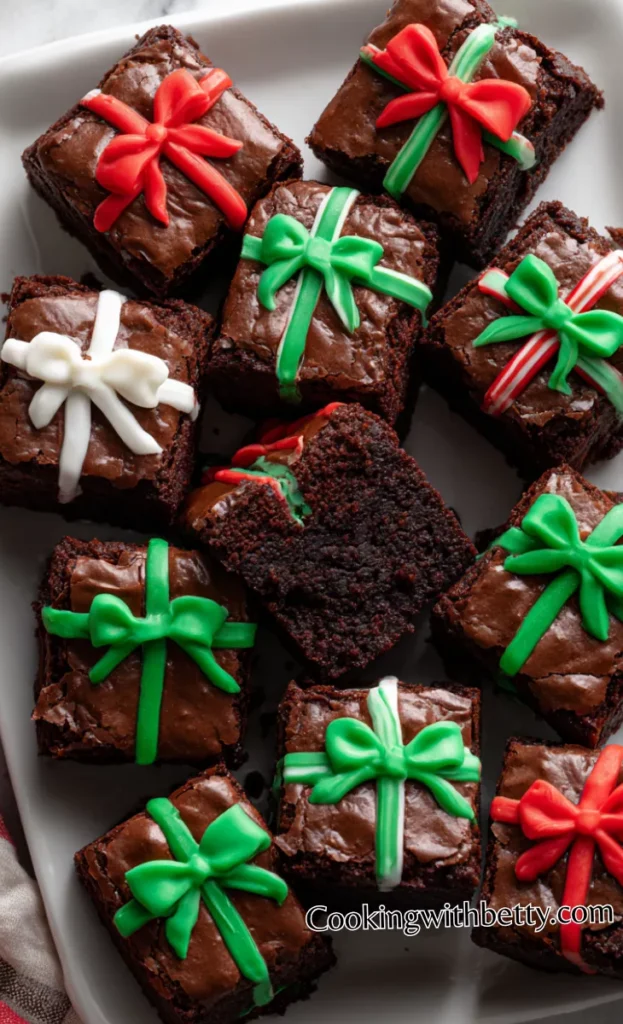
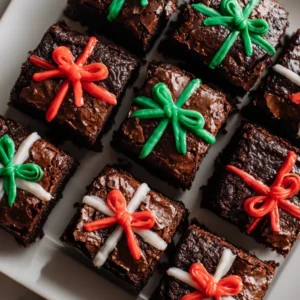
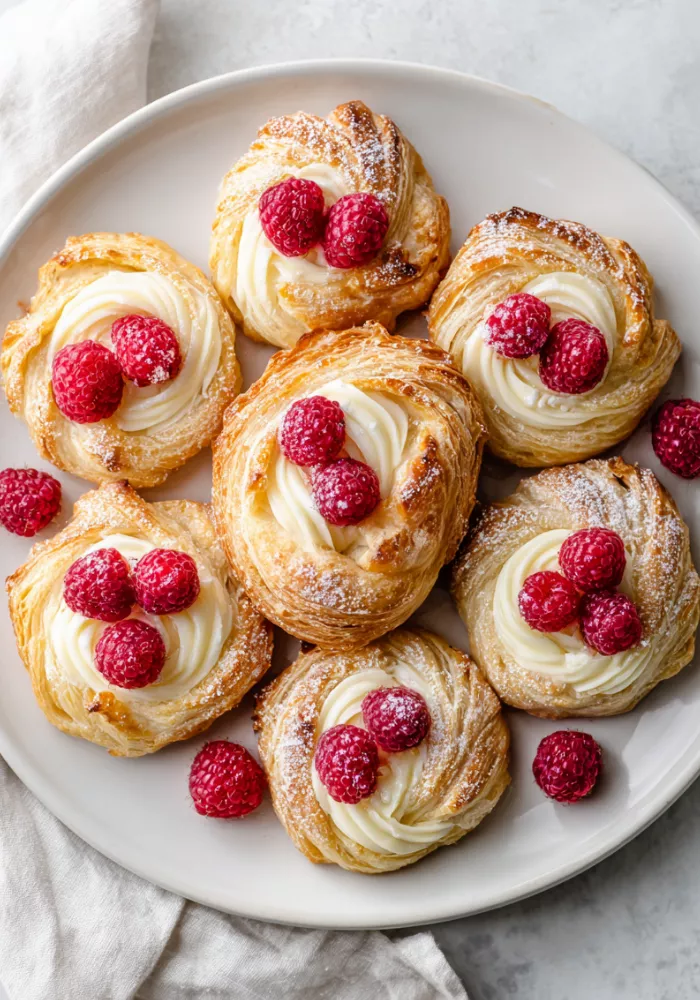
My Kids love anything with chocolate, but what makes these brownies their favorite is the fun part—decorating them like little presents with ribbons and sprinkles. These Christmas Present Brownies are more than just desserts—they’re little edible gifts, wrapped with sweet ribbons of candy melts and topped with joy. Fudgy, rich, and delightfully festive, they make every celebration feel extra special. Seeing their faces light up while they drizzle the candy melts and stick on tiny bows is the best part of the holiday baking tradition. It’s messy, yes, but in the sweetest way possible, and it fills the kitchen with laughter and excitement.
I have a habit of baking these every Christmas Eve. I use real butter, dark cocoa powder, and a handful of chocolate chips for that deep, rich flavor. Always let them cool completely before cutting—this keeps the edges clean and the texture soft and fudgy.
You can serve them with a scoop of vanilla ice cream, a swirl of peppermint whipped cream, or a mug of hot cocoa. Some people love adding a dusting of powdered sugar, while others like serving them warm with a drizzle of caramel sauce.
It’s Perfect For:
- Holiday dessert platters
- Homemade edible gifts for friends
- Chocolate lovers of all ages
- Coffee or cocoa time during cold evenings
- Family baking and decorating fun
Ingredients
- 1 cup (2 sticks) unsalted butter
- 2 cups granulated sugar
- 4 large eggs
- 1 teaspoon vanilla extract
- 1 cup all-purpose flour
- 1 cup unsweetened cocoa powder
- ½ teaspoon baking powder
- ¼ teaspoon salt
- 1 cup semi-sweet chocolate chips (optional for extra fudginess)
- Red, green, and white candy melts (for decoration)
- Mini candy bows or holiday sprinkles (optional but festive!)
Kitchen Equipment You’ll Need
- 9×13-inch baking pan
- Parchment paper
- Mixing bowls (one large, one medium)
- Whisk and rubber spatula
- Measuring cups and spoons
- Saucepan (for melting butter)
- Wire cooling rack
- Piping bags or small plastic bags (for decorating)
How to Make Christmas Present Brownies
Step 1
Prepare the brownie batter: Preheat your oven to 350°F (175°C). Line a 9×13-inch baking pan with parchment paper, leaving a little overhang on the sides for easy removal later. In a medium saucepan, melt the butter over low heat. Once melted, remove from heat and whisk in the sugar until smooth and shiny. Let it cool slightly before adding the eggs and vanilla extract, whisking continuously until the mixture looks thick and glossy.
Step 2
Add the dry ingredients: In another bowl, sift together the flour, cocoa powder, baking powder, and salt. Gradually fold the dry ingredients into the wet mixture using a rubber spatula. Stir until everything is well combined and smooth—avoid overmixing so your brownies stay chewy. If you’re feeling extra indulgent, fold in a cup of chocolate chips for that rich, gooey bite.
Step 3
Bake the brownies: Pour the batter evenly into your prepared pan and smooth the top with a spatula. Bake for about 30–35 minutes, or until a toothpick inserted in the center comes out with a few moist crumbs (not wet batter). Don’t overbake—brownies continue to cook slightly after being removed from the oven. Let them cool completely in the pan before decorating.
Step 4
Cut and decorate like gifts: Once the brownies are cool, lift them out of the pan using the parchment paper and place them on a cutting board. Cut into even squares—these will be your “presents.” Melt the red, green, and white candy melts in separate bowls (microwave in 15-second bursts, stirring in between until smooth). Drizzle or pipe the melted candy over each brownie in crisscross lines to resemble ribbons. Add mini bows, tiny candies, or festive sprinkles on top for a finishing touch.
Step 5
Let the decorations set: Allow the candy melts to harden at room temperature or speed up the process by refrigerating them for 10–15 minutes. Once set, arrange your Christmas Present Brownies on a platter or in a gift box lined with parchment paper—they look adorable and taste just as delightful!
Tips for the Best Christmas Present Brownies
- Use room temperature eggs – Cold eggs can make the butter seize, affecting the texture. Let them sit out for 10–15 minutes before mixing.
- Don’t overmix the batter – Stir just until combined to keep your brownies moist and dense, not cakey.
- Line the pan with parchment paper – It makes removal easy and prevents the brownies from sticking or breaking apart.
- Use high-quality cocoa powder – The flavor of your brownies depends on it. Dutch-process cocoa gives a deeper, smoother chocolate taste.
- Test for doneness correctly – A few moist crumbs on the toothpick mean perfection; if it comes out clean, you’ve overbaked them.
- Cool completely before cutting – Warm brownies crumble easily. Cooling helps you get neat, square “present” shapes.
- Decorate only after cooling – The candy melts will run if the brownies are warm. Patience here makes your presentation beautiful.
Optional Ingredients
- Chopped nuts (for a crunchy texture)
- Espresso powder (to intensify chocolate flavor)
- Mini marshmallows (for a gooey surprise)
- Peppermint extract (adds a festive twist)
- Sea salt flakes (balances the sweetness)
- Crushed candy canes (for decoration and flavor)
How to Serve Christmas Present Brownies
I love serving these brownies on a large white platter, neatly arranged in rows like a tray of tiny Christmas gifts. The red, green, and white candy ribbons make them pop beautifully against a simple white background, perfect for any festive table. They’re also stunning when placed inside small paper cupcake liners—it gives them that polished, bakery-style look.
If you’re serving them at a holiday party, stack a few on a tiered dessert stand alongside cookies and truffles. Add a few fresh mint leaves or sprinkles of powdered sugar for a wintery snow effect. Guests can easily grab one without needing utensils, making them ideal finger desserts.
I also love packaging them individually in clear cellophane bags tied with red ribbons and a tiny “Merry Christmas” tag. They make wonderful gifts for teachers, coworkers, or neighbors. The look on someone’s face when they realize their “gift” is actually a brownie is priceless—it’s a sweet way to spread joy.
Is Christmas Present Brownies Healthy?
While these brownies are a treat meant for indulgence, they can be made slightly healthier with a few tweaks. You can replace part of the butter with unsweetened applesauce or use coconut sugar instead of refined white sugar. These small changes reduce fat and sweetness without sacrificing flavor.
Remember, balance is key. Enjoying a brownie or two during the holidays won’t hurt your health—it’s the joy and togetherness that make this dessert truly nourishing to the soul.
Variations and Substitutions
- Gluten-Free Version: Use a 1:1 gluten-free flour blend and ensure all decorations are certified gluten-free. Still gives a fudgy, chewy result.
- Vegan Brownies: Replace eggs with flaxseed eggs and butter with coconut oil or vegan butter. The flavor remains rich and satisfying.
- Mint Chocolate Version: Add ½ teaspoon of peppermint extract to the batter and top with crushed candy canes for a cool finish.
- White Chocolate Swirl: Drizzle melted white chocolate into the batter before baking for a marbled effect that looks stunning.
- Nutty Brownies: Stir in chopped walnuts, pecans, or almonds for crunch and flavor. They also add healthy fats and texture.
- Espresso Brownies: Add a teaspoon of espresso powder to intensify the chocolate—perfect for coffee lovers.
- Caramel-Filled Brownies: Spoon a layer of caramel in the middle of the batter for a gooey surprise center.
- Fruity Twist: Add dried cranberries or cherries for a chewy, tangy balance that complements the chocolate perfectly.
How to Store and Reheat
To store, let the brownies cool completely before placing them in an airtight container. You can store them at room temperature for up to 4 days, or refrigerate them for up to a week. If stacking, separate layers with parchment paper so the decorations don’t stick together.
To reheat, warm individual brownies in the microwave for about 10–15 seconds. This brings back the soft, fudgy texture without melting the candy decorations. For larger batches, cover with foil and reheat in a 300°F (150°C) oven for 5–7 minutes.
Frequently Asked Questions About Christmas Present Brownies
Q1: Can I make these brownies ahead of time?
Yes! You can bake the brownies a day or two in advance and keep them in an airtight container. Just decorate them closer to serving time so the candy melts stay bright and crisp. They’re great for busy moms who want to prep early before the Christmas rush.
Q2: What if I don’t have candy melts?
No worries! Melt white chocolate chips and add a few drops of food coloring to create your own festive ribbons. You can also use colored icing or buttercream for a softer, creamier look. The key is making it colorful and fun.
Q3: Can I use boxed brownie mix?
Definitely! If you’re short on time, a boxed mix is a lifesaver. Follow the package directions, then focus your creativity on decorating. Add a teaspoon of vanilla or espresso powder to elevate the flavor so it tastes homemade.
Q4: Why did my brownies turn out dry?
This usually happens if they’re baked too long or if your oven runs hotter than average. Always check your brownies 5 minutes early and look for a few moist crumbs on the tester. Also, store them properly to keep them from drying out.
Christmas Present Brownies
Ingredients
- 1 cup 2 sticks unsalted butter
- 2 cups granulated sugar
- 4 large eggs
- 1 teaspoon vanilla extract
- 1 cup all-purpose flour
- 1 cup unsweetened cocoa powder
- ½ teaspoon baking powder
- ¼ teaspoon salt
- 1 cup semi-sweet chocolate chips optional for extra fudginess
- Red green, and white candy melts (for decoration)
- Mini candy bows or holiday sprinkles optional but festive!
Instructions
- Prepare the brownie batter: Preheat your oven to 350°F (175°C). Line a 9×13-inch baking pan with parchment paper, leaving a little overhang on the sides for easy removal later. In a medium saucepan, melt the butter over low heat. Once melted, remove from heat and whisk in the sugar until smooth and shiny. Let it cool slightly before adding the eggs and vanilla extract, whisking continuously until the mixture looks thick and glossy.
- Add the dry ingredients: In another bowl, sift together the flour, cocoa powder, baking powder, and salt. Gradually fold the dry ingredients into the wet mixture using a rubber spatula. Stir until everything is well combined and smooth—avoid overmixing so your brownies stay chewy. If you’re feeling extra indulgent, fold in a cup of chocolate chips for that rich, gooey bite.
- Bake the brownies: Pour the batter evenly into your prepared pan and smooth the top with a spatula. Bake for about 30–35 minutes, or until a toothpick inserted in the center comes out with a few moist crumbs (not wet batter). Don’t overbake—brownies continue to cook slightly after being removed from the oven. Let them cool completely in the pan before decorating.
- Cut and decorate like gifts: Once the brownies are cool, lift them out of the pan using the parchment paper and place them on a cutting board. Cut into even squares—these will be your “presents.” Melt the red, green, and white candy melts in separate bowls (microwave in 15-second bursts, stirring in between until smooth). Drizzle or pipe the melted candy over each brownie in crisscross lines to resemble ribbons. Add mini bows, tiny candies, or festive sprinkles on top for a finishing touch.
- Let the decorations set: Allow the candy melts to harden at room temperature or speed up the process by refrigerating them for 10–15 minutes. Once set, arrange your Christmas Present Brownies on a platter or in a gift box lined with parchment paper—they look adorable and taste just as delightful!
Leave a Reply